

How To Install Iphone 7 Plus Screen
The iPhone 7 Plus'south screen is beautiful, to be sure — but that glass beauty can break if dropped, smashed, or otherwise chipped confronting similarly-hard surfaces. Some breaks are worse than others, just if you lot completely smash your screen, yous're probably in need of a screen repair.
Afterward all, modern iPhone screens aren't but LCD and glass: They pack several unlike components in ane. The digitizer reads your finger contact and motility; the LCD displays all the images, video, and other visual data, and the glass screen helps shield the inner components of the phone. Every bit such, whether you scissure the glass, run into a black screen, or tin can't interact with your phone via affect, you lot'll demand to replace the entire screen to get your phone working properly again. When you crack your screen, it also destroys your iPhone's water resistance; if you're used to keeping it near water, you'll definitely desire to fix your device.
There are several means to repair or supersede a broken iPhone screen, depending on your monetary situation and complimentary time. Here are a couple, in guild of easiest (and cheapest) to nigh complicated.
- Purchase a screen protector
- Get Apple to gear up it
- Fix it yourself
- Required tools and parts
- Open the iPhone
- Disconnect the cables
- Remove the camera and speaker
- Remove the home button
- Supplant the screen
- Put it all back together
Buy a screen protector
If your screen is shattered but relatively intact, you lot tin can put off a potentially-costly repair past sealing the broken pieces behind a screen protector. I'll note that this is a temporary measure, and one I by and large recommend for screens that are cracked, but not completely destroyed — it can proceed the cracks from worsening or pieces of the screen from falling apart, but eventually, you'll need to supplant the screen. It also won't maintain your iPhone's water resistance.
- Meet at Amazon
- All-time iPhone 7 Plus Screen Protectors
- How to replace a tempered glass screen protector
Brand an appointment with Apple tree
The iPhone 7 and 7 Plus screens have more complicated engineering science embedded within them than whatever iPhone before them: Between the Touch ID sensor, Taptic Engine-based Home Push, 3D Touch display, and FaceTime forepart-facing photographic camera, a cracked iPhone screen can be a real hassle to supercede.
Luckily, if y'all purchased AppleCare+ with your iPhone, a screen repair is unproblematic and cheap — assuming you lot have the fourth dimension to send information technology to Apple. It's but $29 to set up a cleaved iPhone 7 or seven Plus screen, and an Apple Store or Apple tree Authorized Service Representative store y'all visit has the equipment necessary to properly remove, supercede, and re-calibrate your iPhone for Touch ID and h2o resistance.
Showtime a repair request
Repair the screen yourself
In past years, we've recommended this option higher up making an appointment with Apple, only equally the iPhone screen has gotten more complicated — a habitation-brew repair can potentially hinder your device from full operability. (You won't be able to re-calibrate your screen for water resistance, for instance.)
Merely if you'd adopt to repair your gadgets yourself, here's the best way to go about it.
Before y'all consider a repair...
If your drinking glass is intact, simply your screen is black or you have lost touch control, you lot should ever try a soft reset of your iPhone earlier this repair.
- Press and hold the Ability push on the right side of your phone.
- While property the Power push button down, press and concur the Book Down button on the left side of your phone.
- Hold both buttons downward until y'all encounter the Apple tree logo on the screen.
If the Apple logo doesn't announced later holding down the buttons and waiting for at to the lowest degree 90 seconds, your phone likely needs a screen repair.
Always make sure to back upward your phone before whatever repair.
Full general repair guidelines
- Always use expert lighting - smart device components are small and you lot'll need plenty of lite to see what you are doing.
- Maintain a clean, organized workspace then you don't lose or confuse any components.
- Grouping your screws and then you can keep track of where they came from. Most screws cannot be interchanged.
- Use enough heat to loosen agglutinative but not enough to damage the device.
- At any point during a repair, if the adhesive becomes difficult to carve up, use more heat.
- Subsequently separating adhesive, keep the housing and screen in close proximity until flex cable is disconnected.
How to replace a broken iPhone 7 Plus screen
The iPhone 7 Plus LCD screen assembly is difficult to remove and replace: Several flex cables can be torn easily, so proceed advisedly. In addition, loosening the screen's adhesive requires controlled heating with a dehydrator or heat gun.
Required tools and parts
Not only will need a new screen — an "LCD Assembly", if you want to be technical about the part — you lot're going to need some tools if you're going to do this correct. Or at all.
- iPhone 7 Plus LCD assembly
- Metal spudger
- Phillips head srewdriver
- Pentalobe screwdriver
- Tri-point screwdriver
- Spudger
- Dehydrator, heat Gun, or oestrus mat
While not required to repair your iPhone, we too recommend you lot use a magnetic mat and spiral capsules to keep everything organized. You're going to be working with some tiny spiral here; these will assistance you keep them on your table and not lost on the floor.
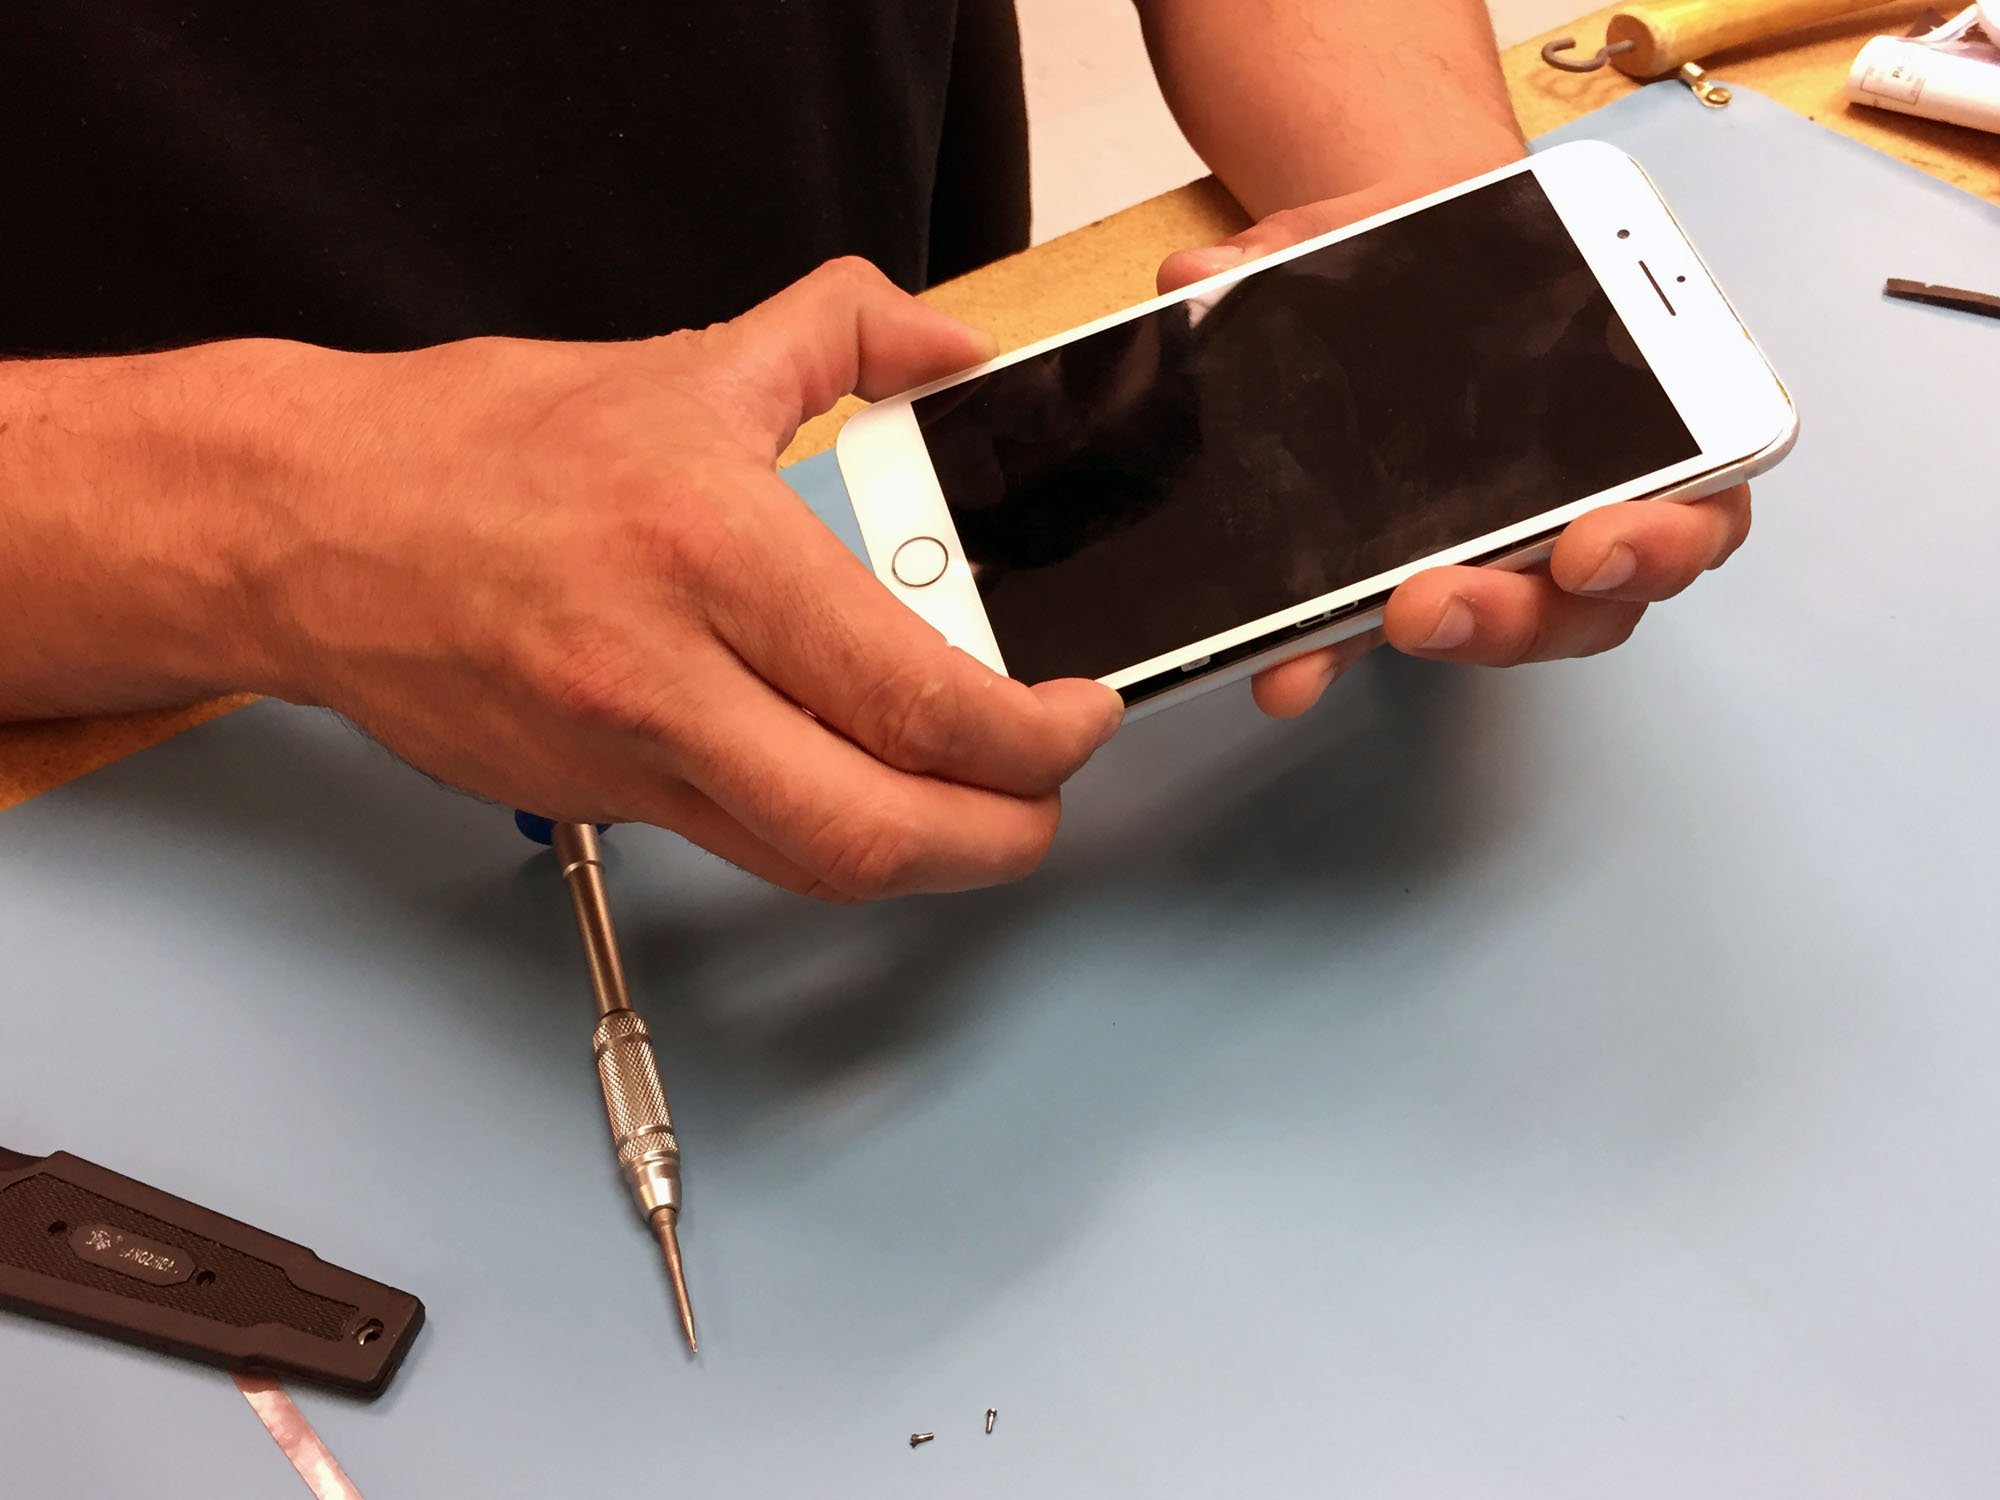
Turn your iPhone off and estrus it upward.
Start by heating upwards the device'due south interior adhesive strips with a dehydrator, rut gun, or estrus mat. Oestrus guns are the quickest, but be careful considering it is piece of cake to overdo information technology and damage the device. Twenty minutes in the dehydrator should be enough. Ten to 20 seconds of a oestrus gun on a depression setting should exist all yous need to loosen the adhesive.
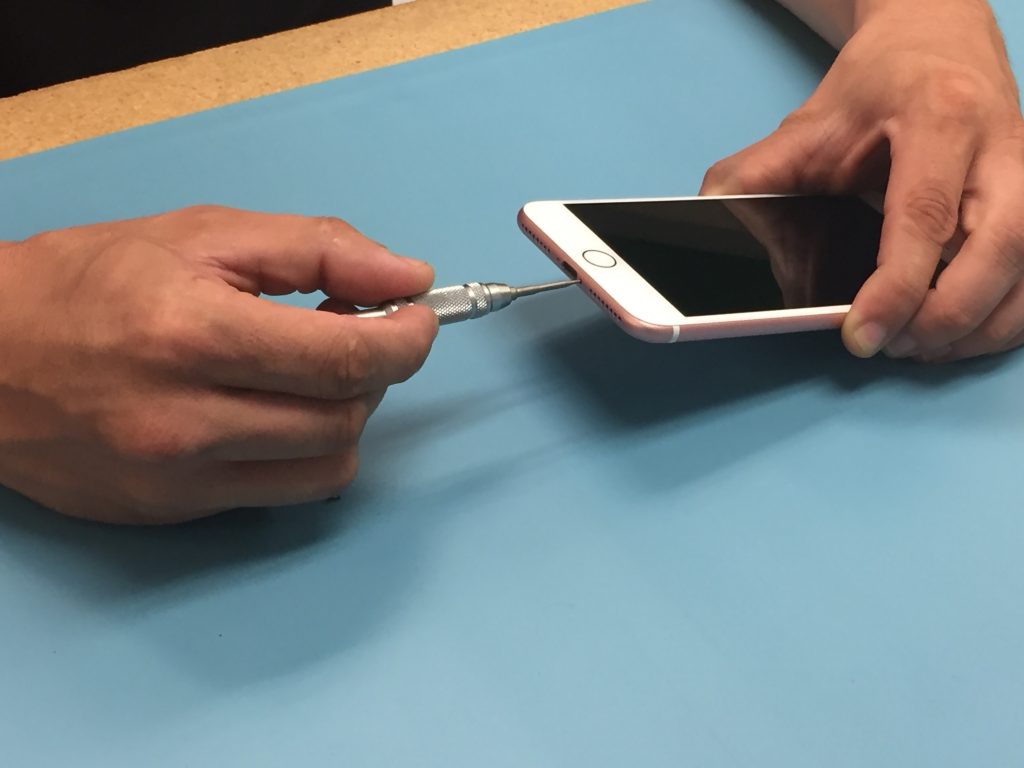
Open up the iPhone
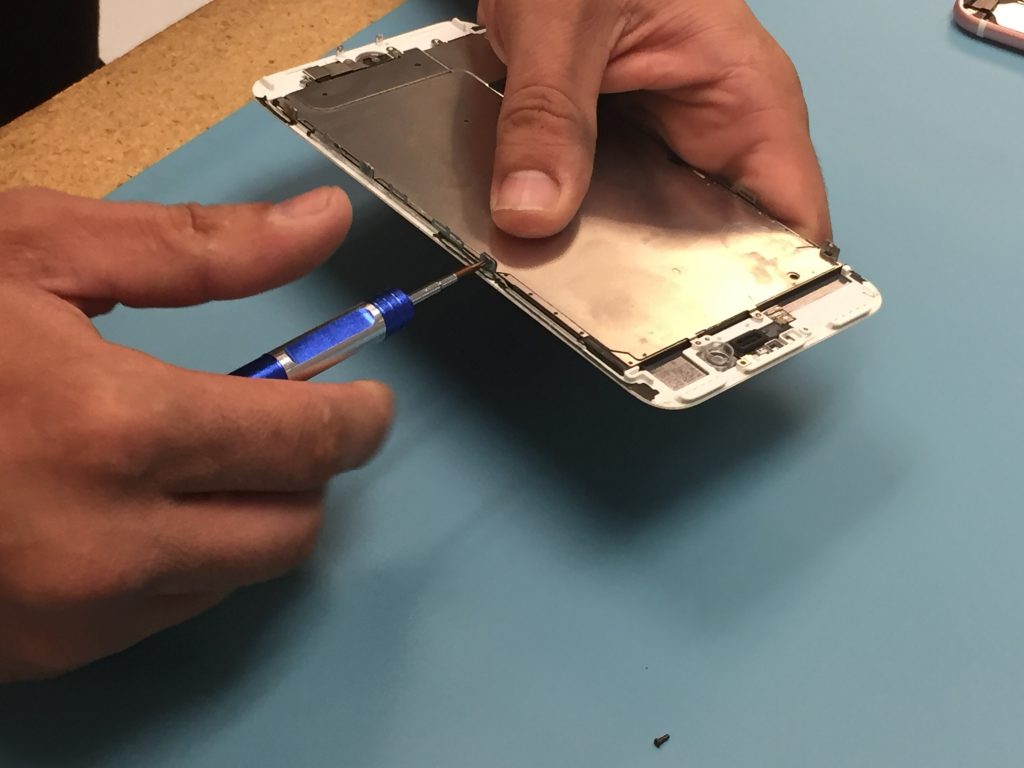
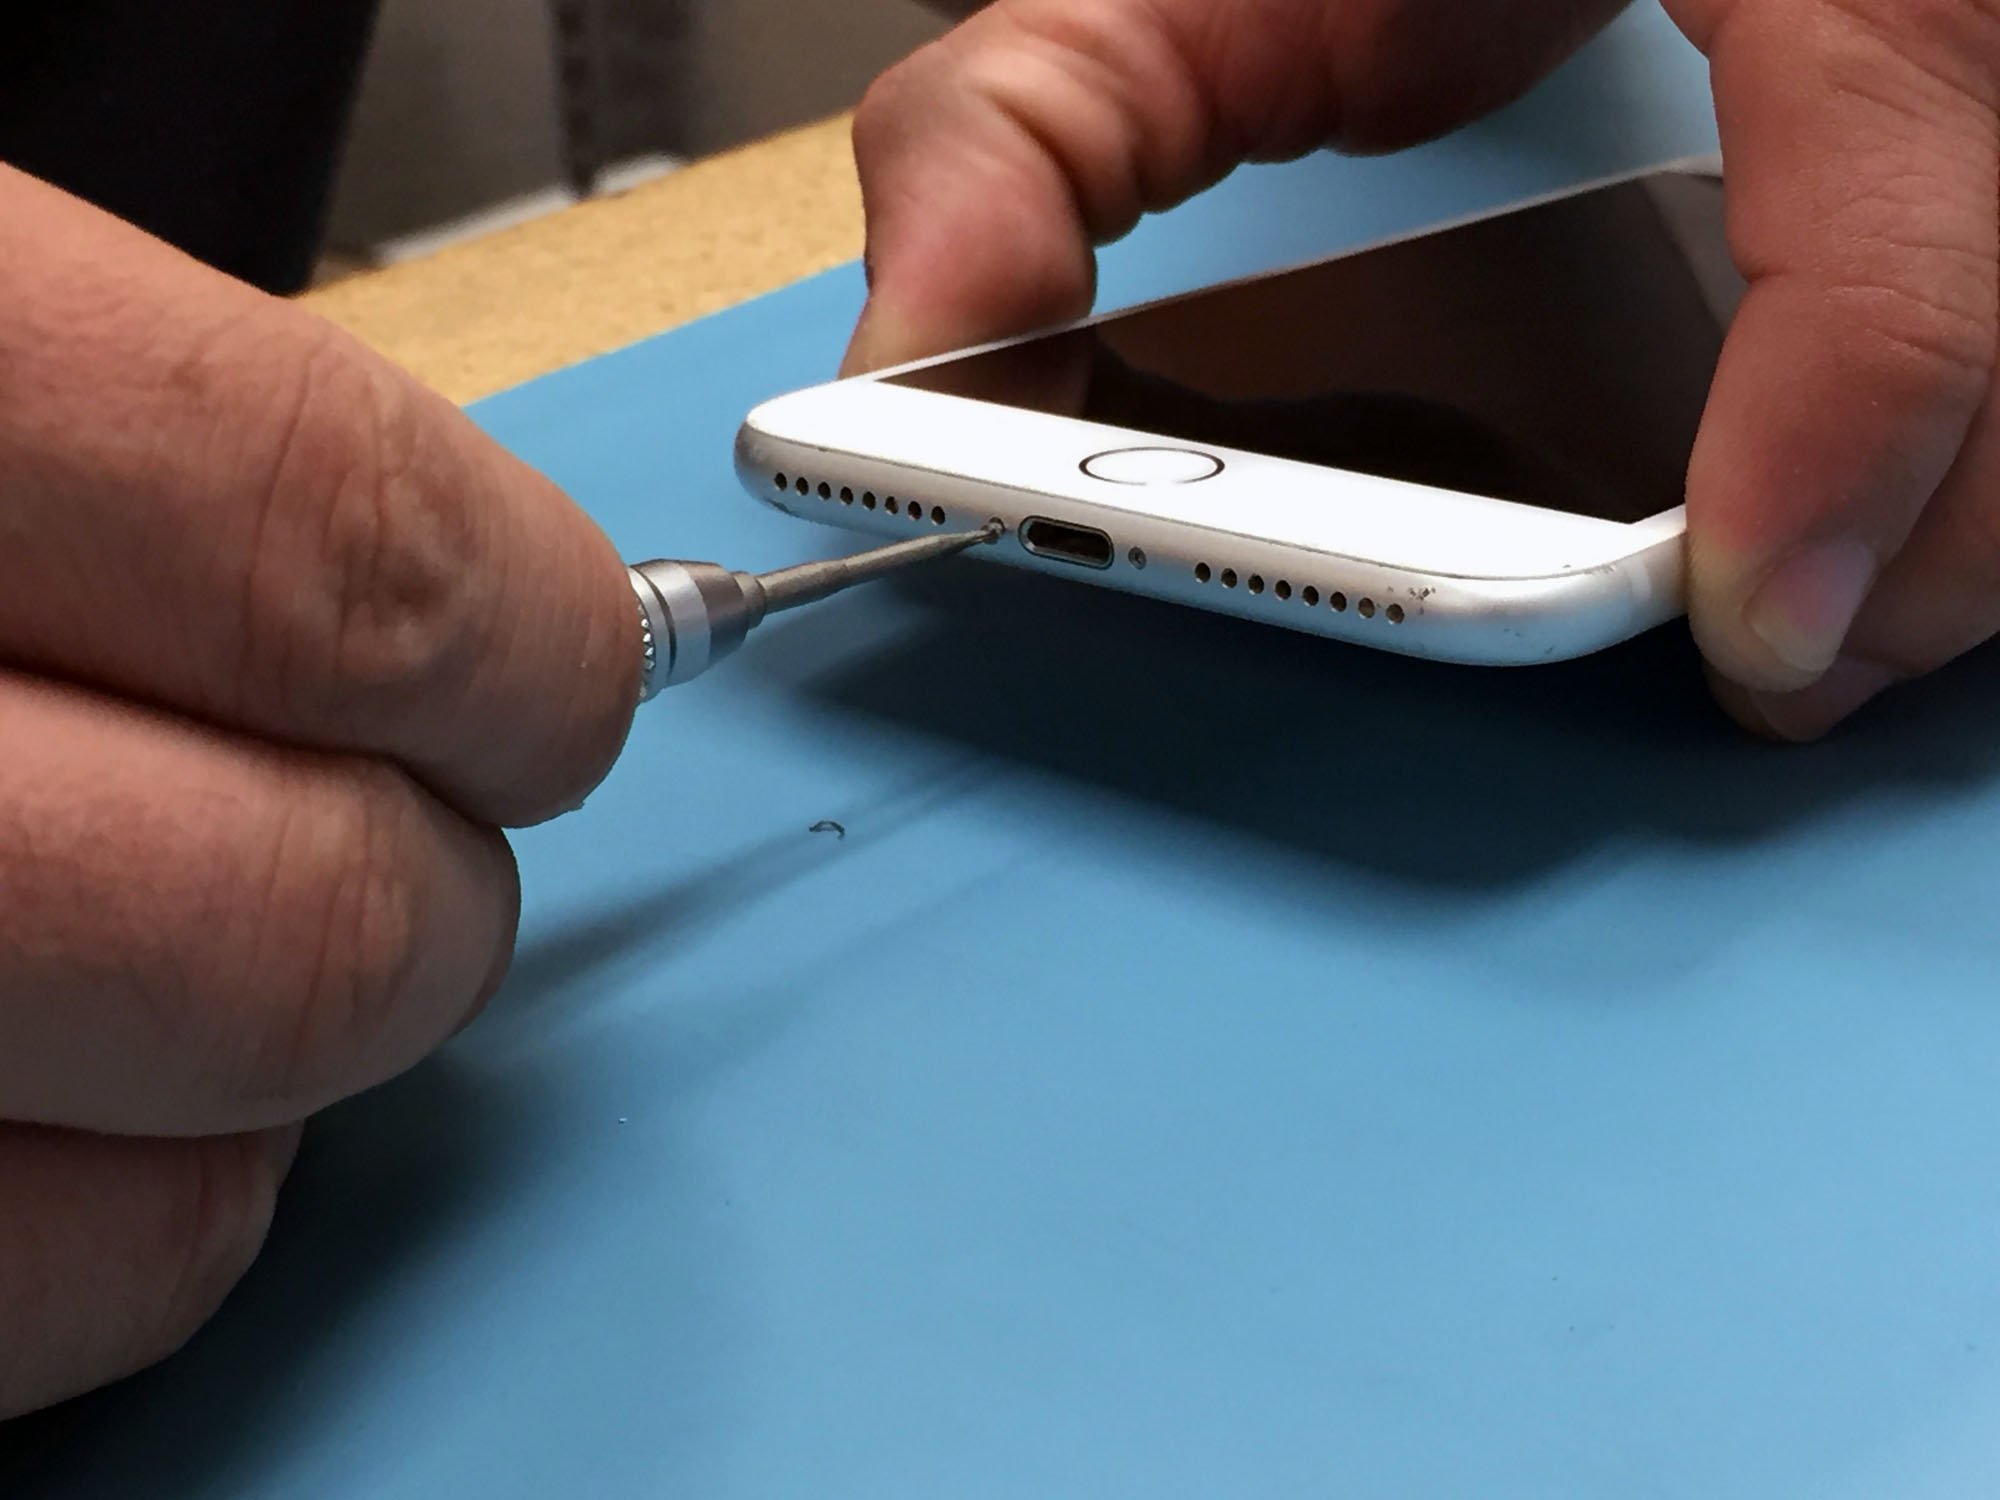
-
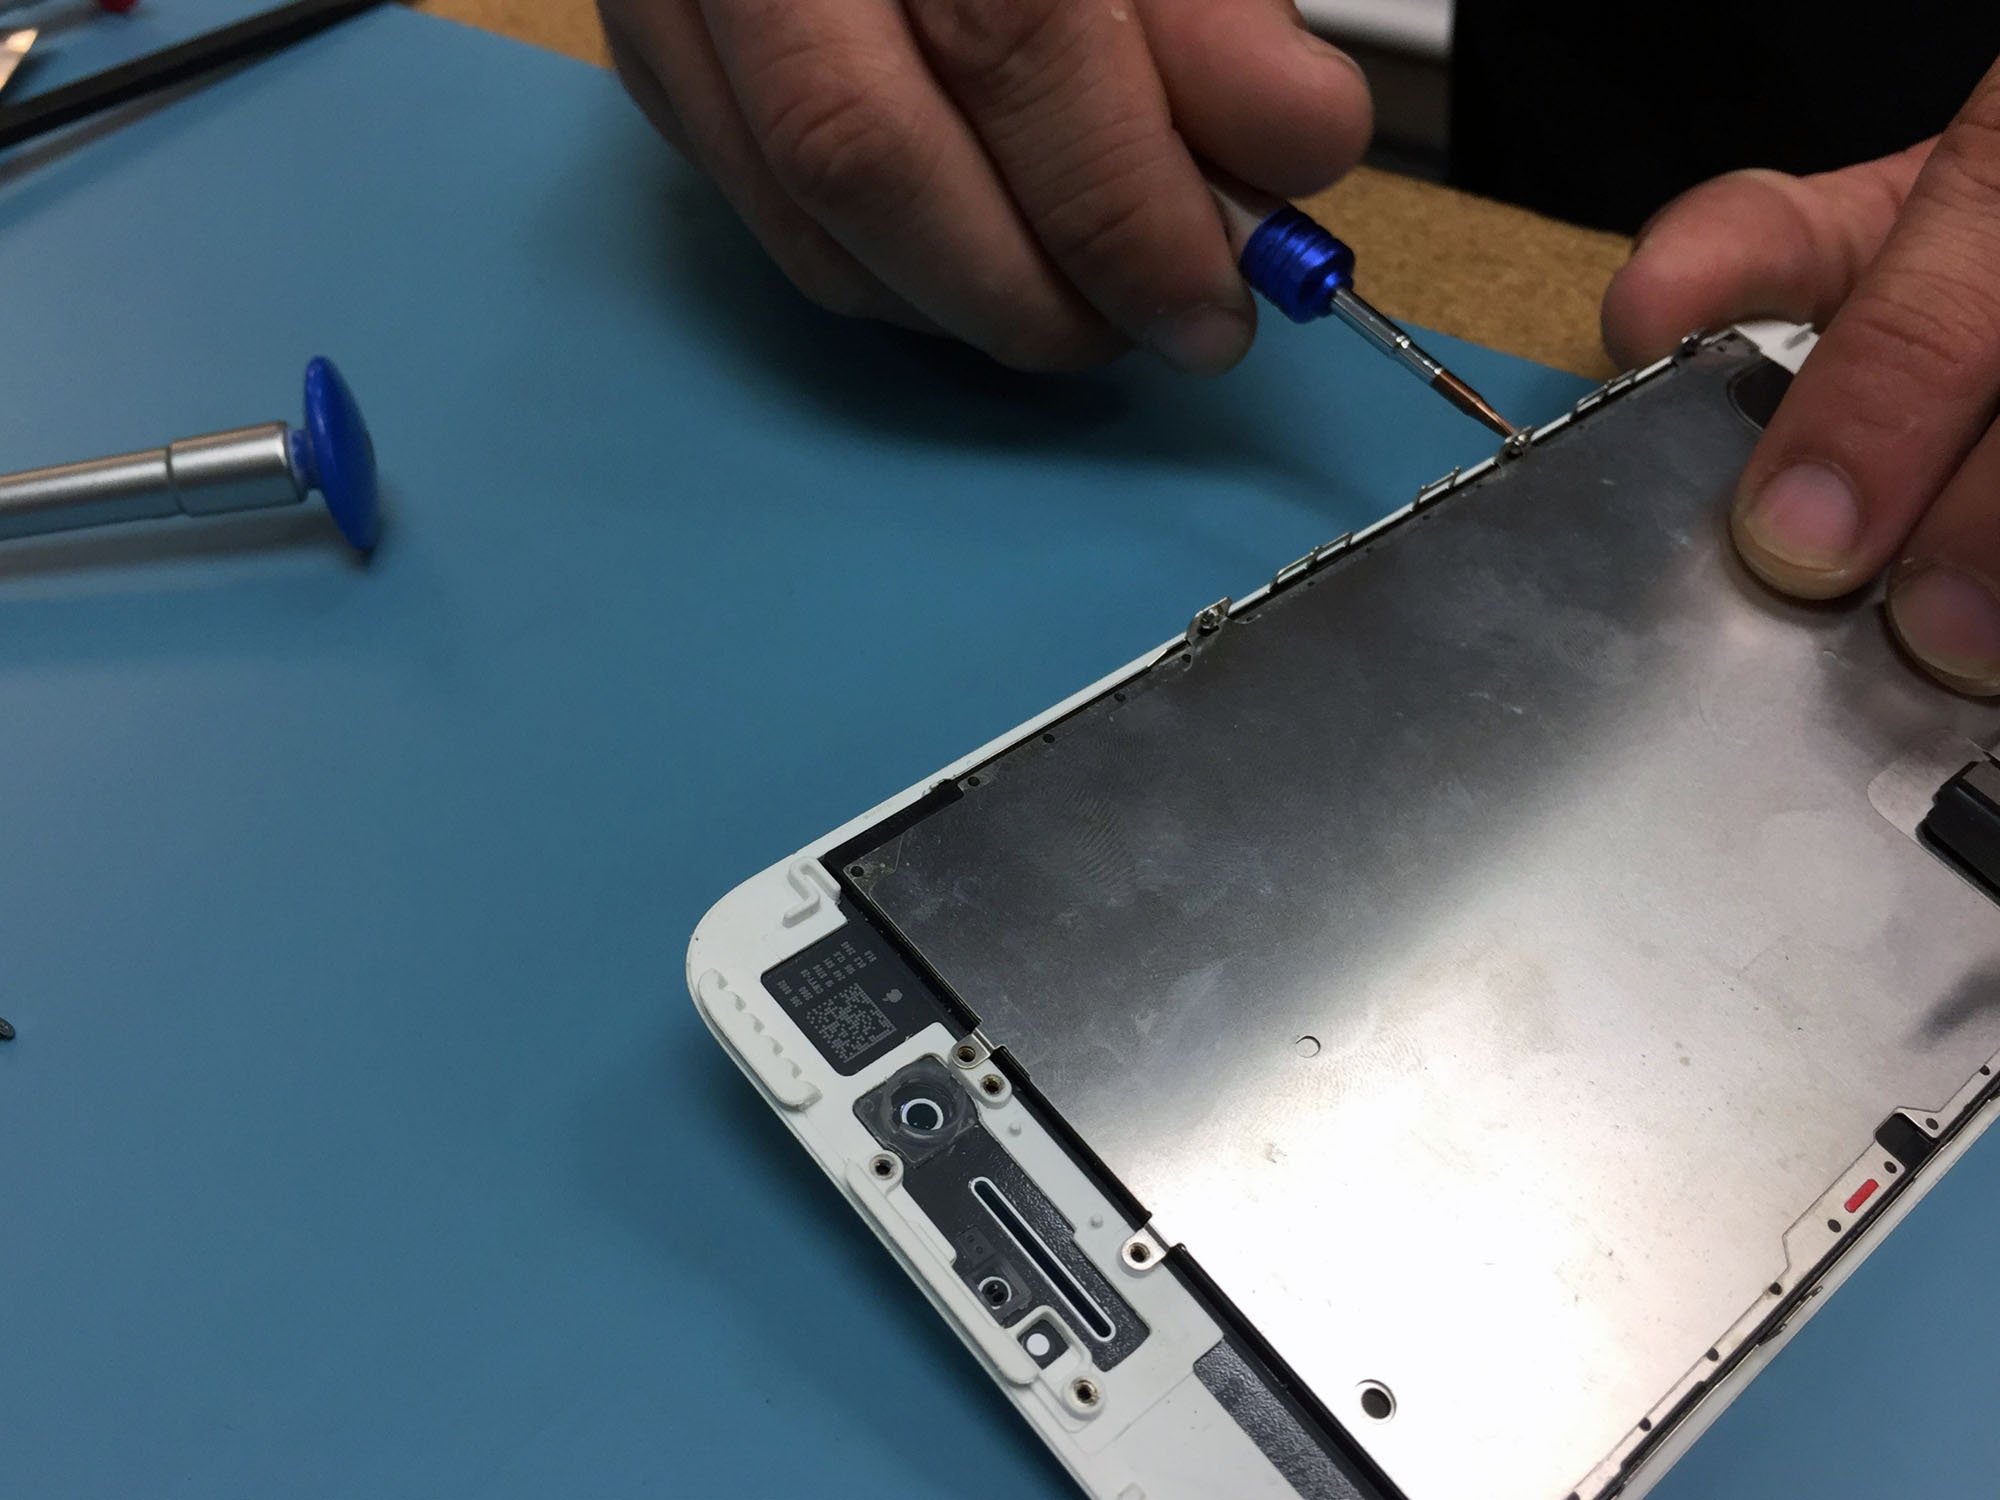
Remove the two pentalobe screws on the lesser edge of the phone. They are on either side of the lightning port.
-
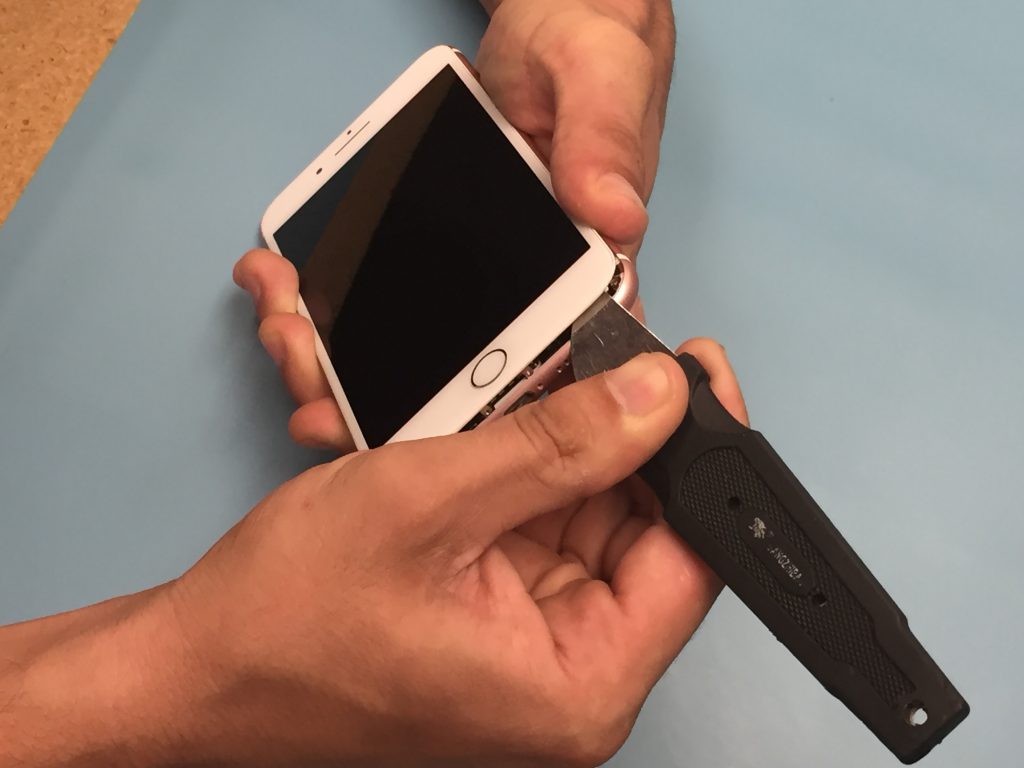
Using the metal spudger, slowly and carefully separate the screen of the iPhone from the body. Start on the bottom edge past the Lightning port and proceed slowly.
-
Continue using the metal spudger or apply playing cards or guitar picks to divide the adhesive from the sides and top. Don't push button the metal spudger too far into the device.
-
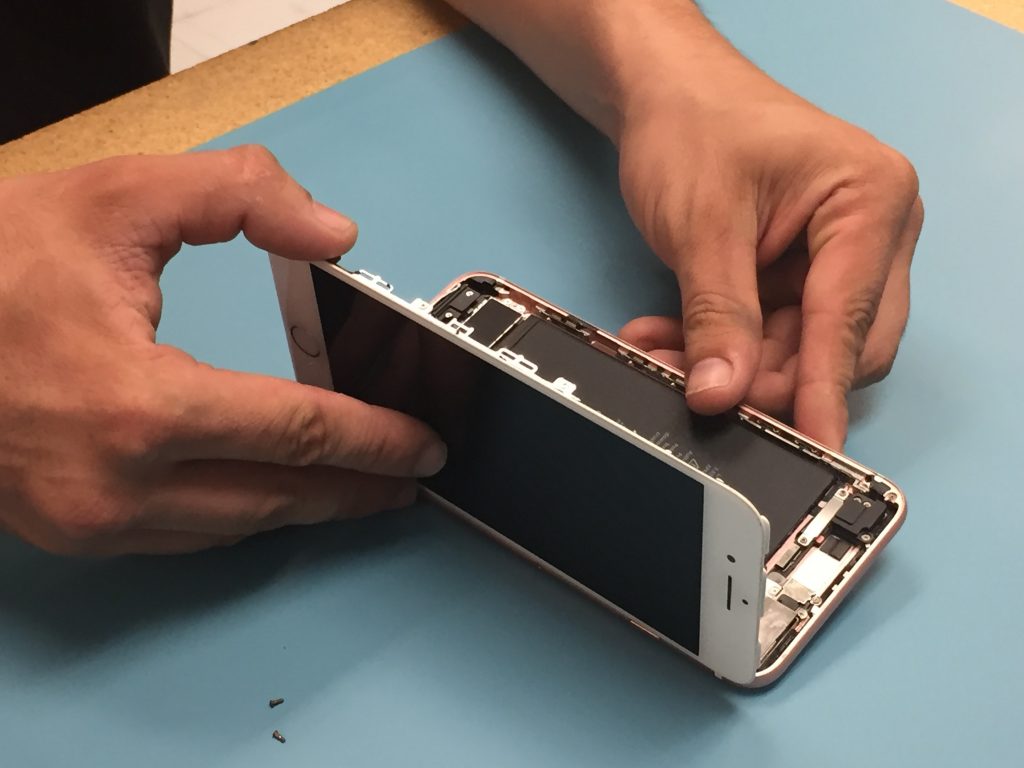
The left side of the screen volition open up off the body similar a volume opened from the dorsum comprehend. The flex cable connecting the screen to the battery will still exist attached, and so exercise circumspection.


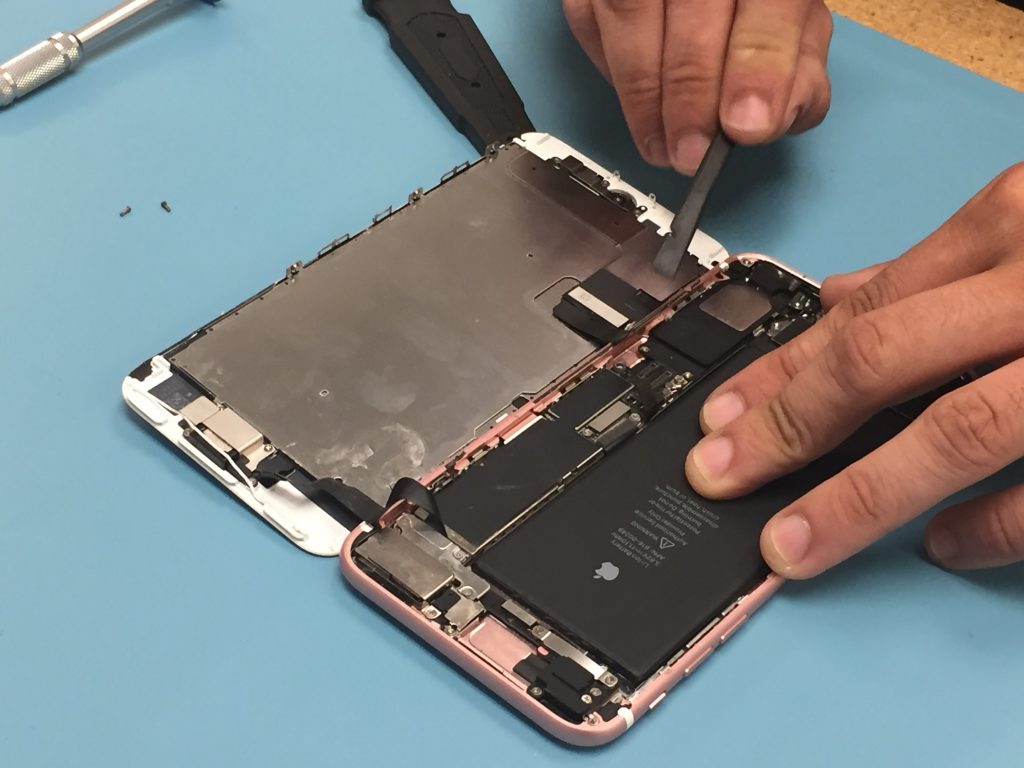
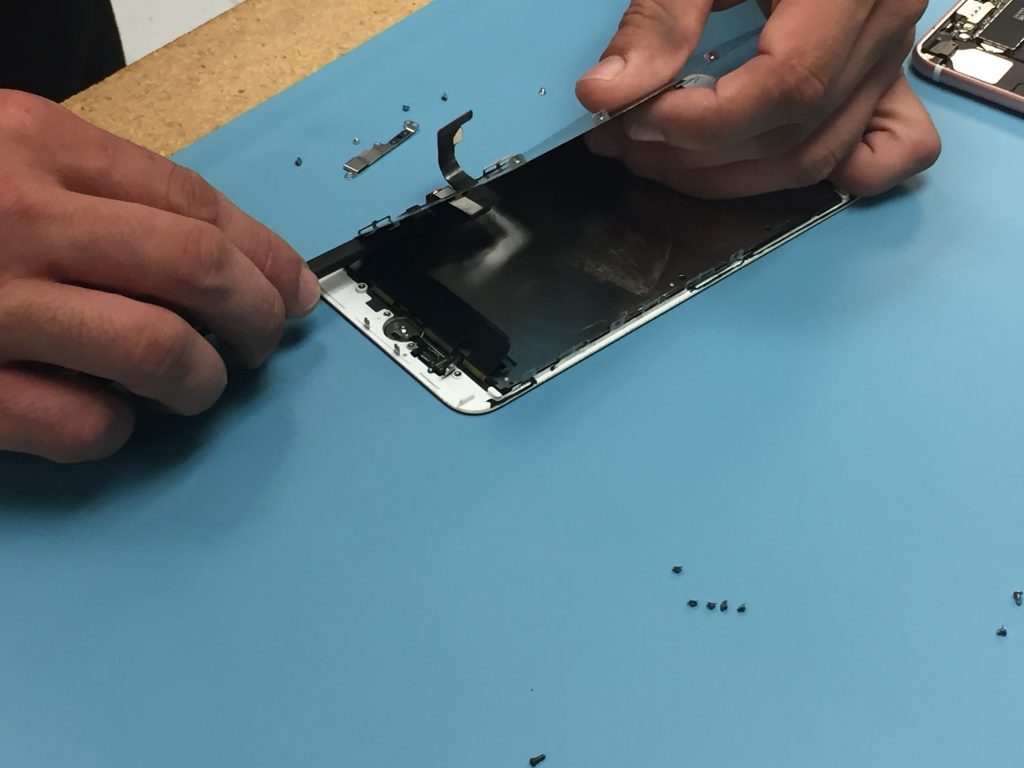
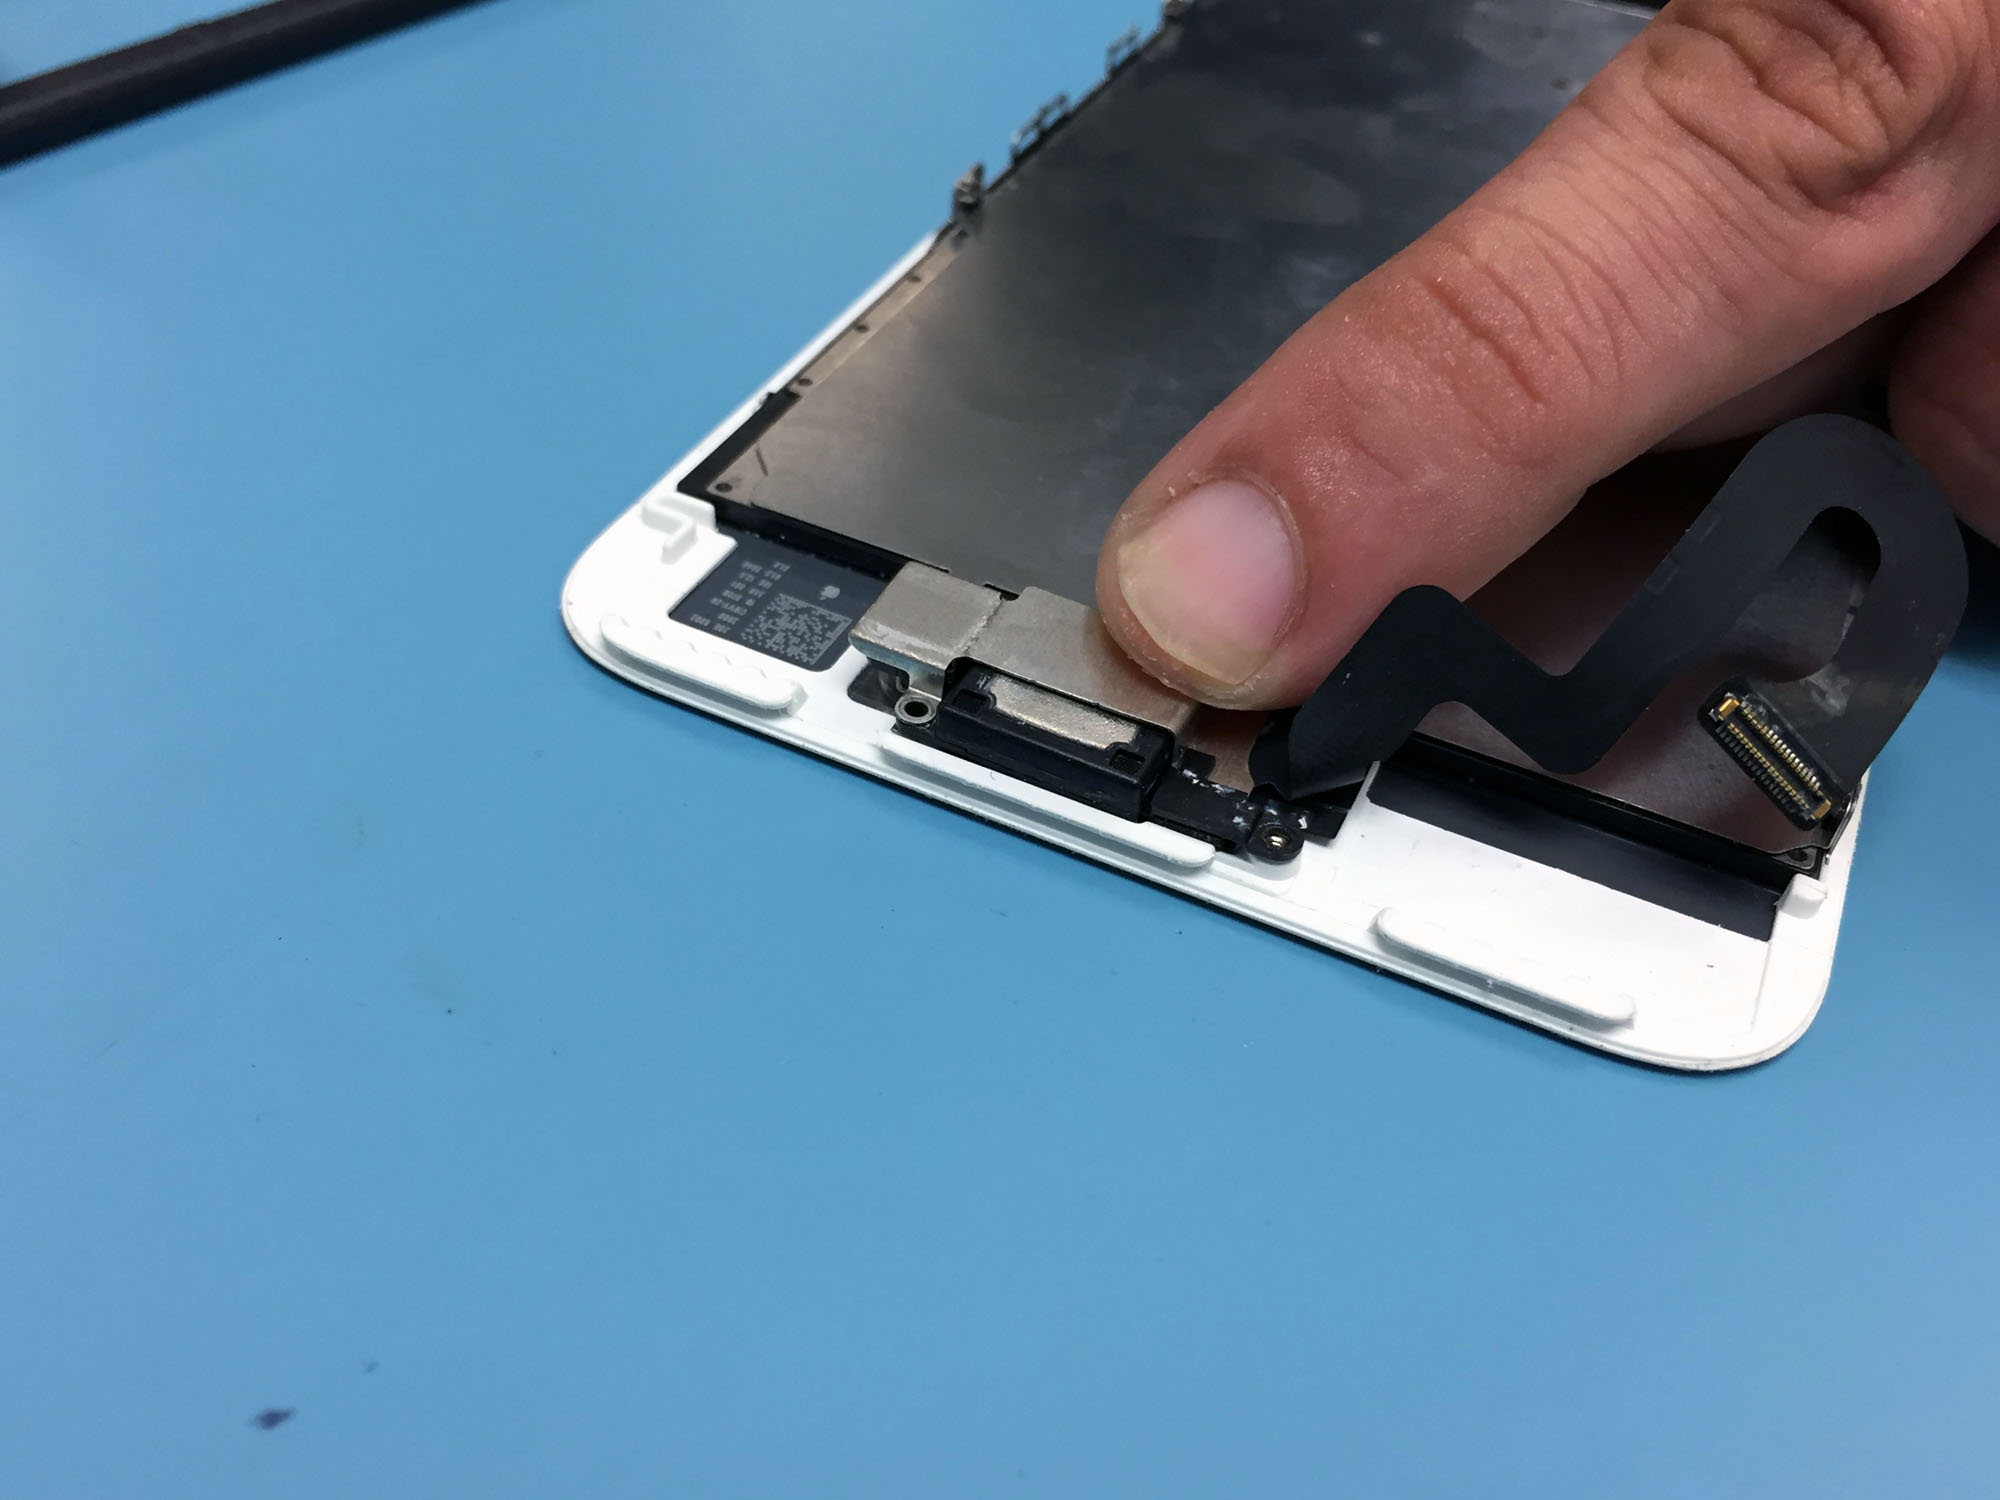
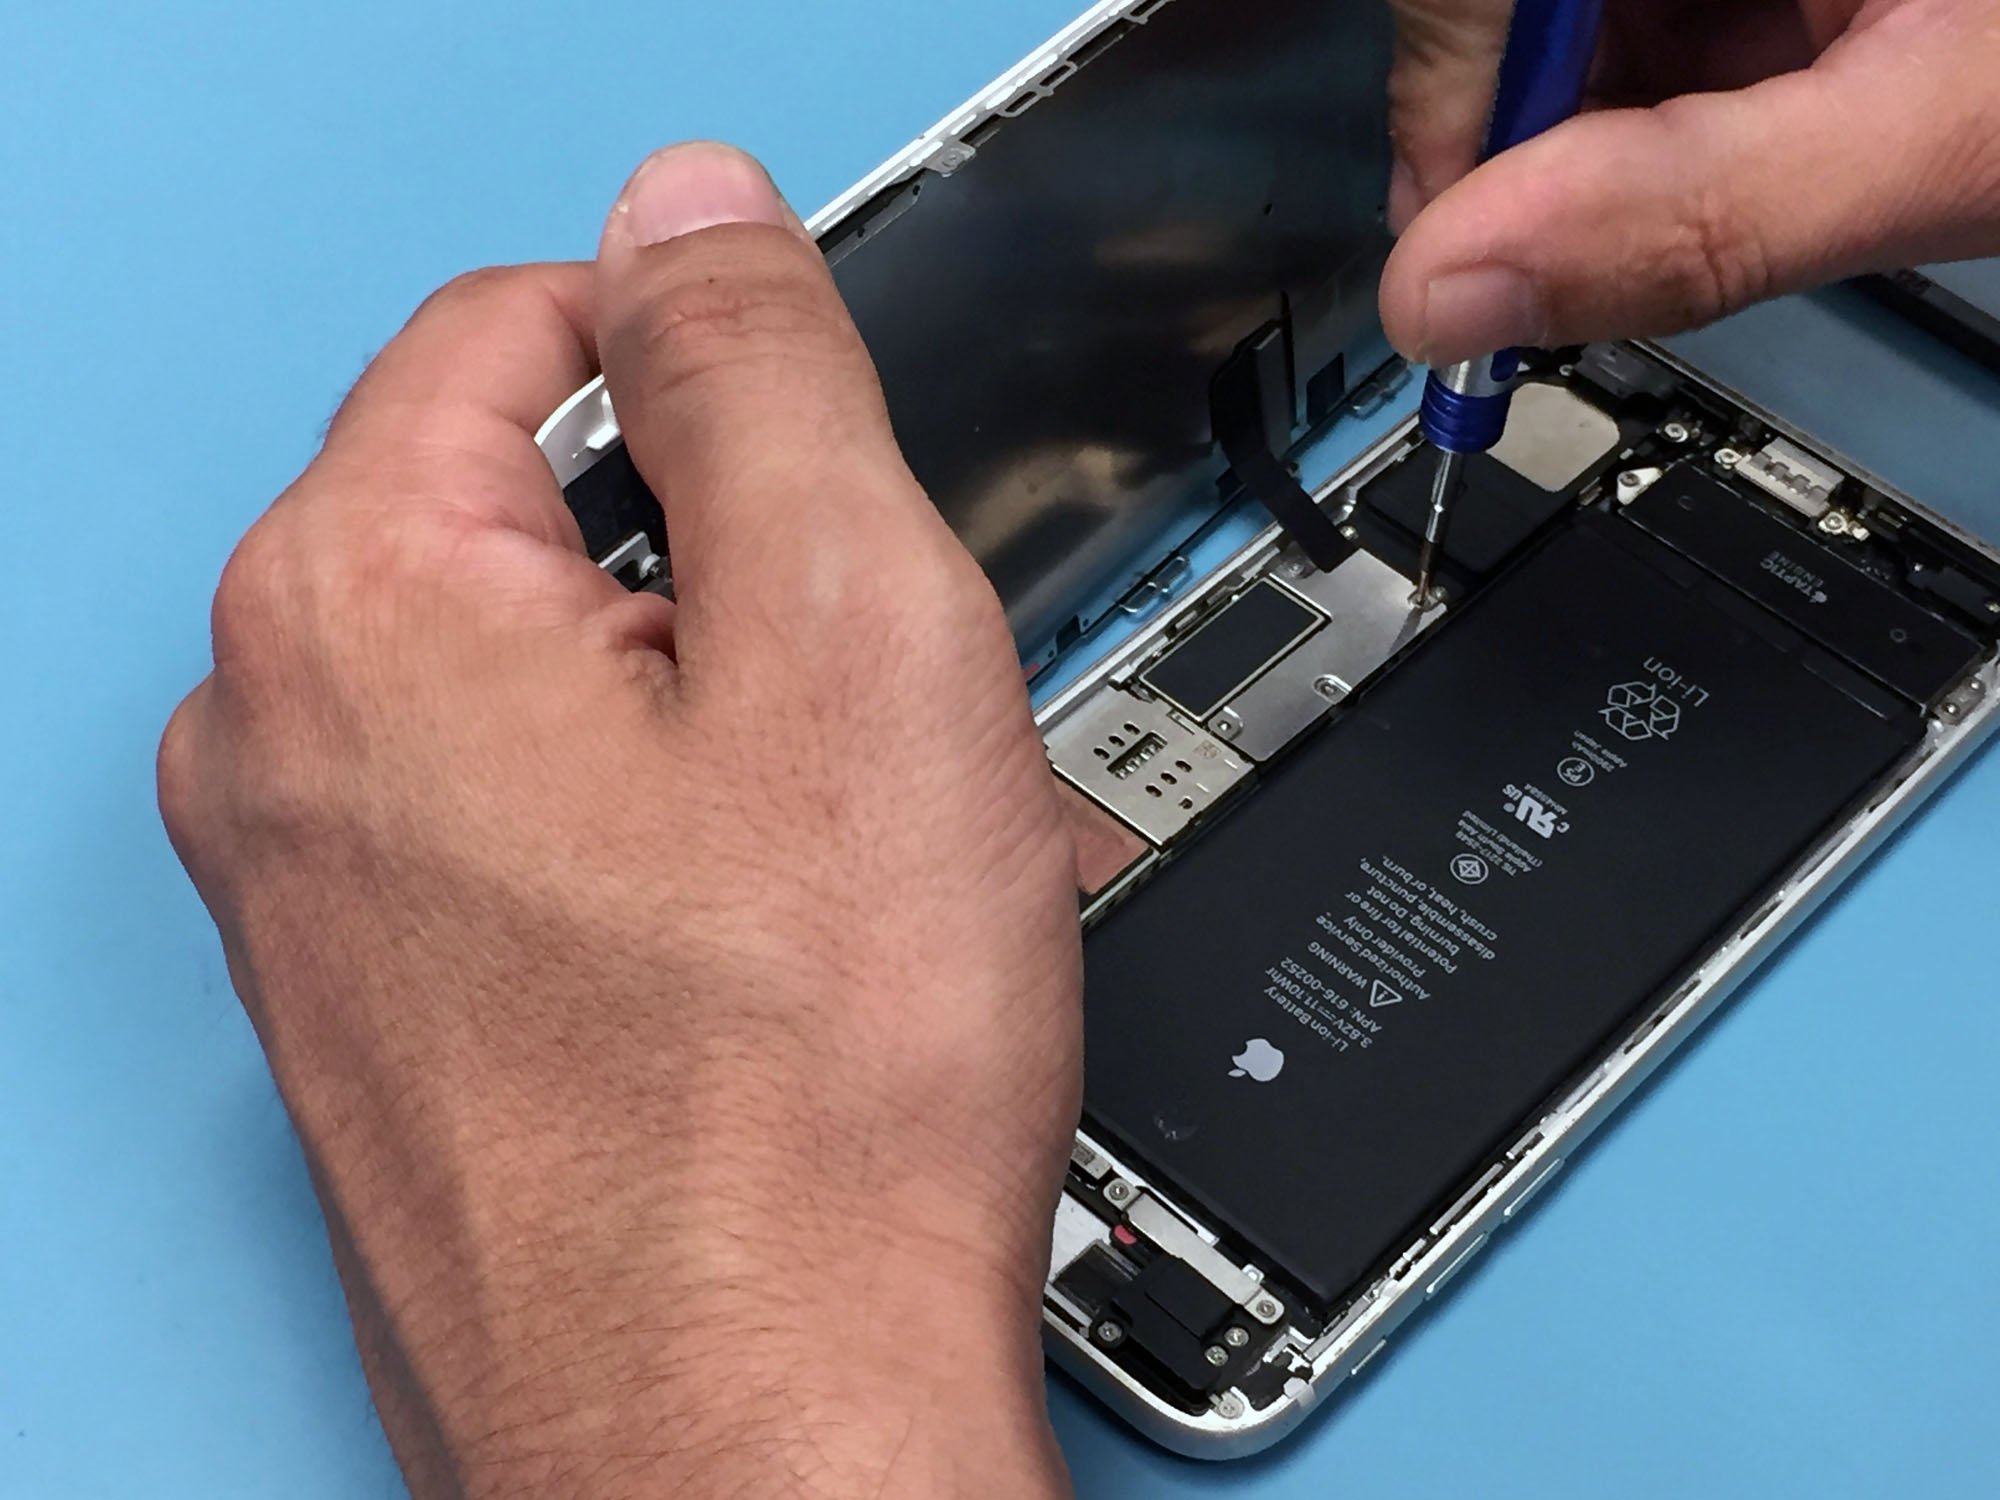
Disconnect the cables
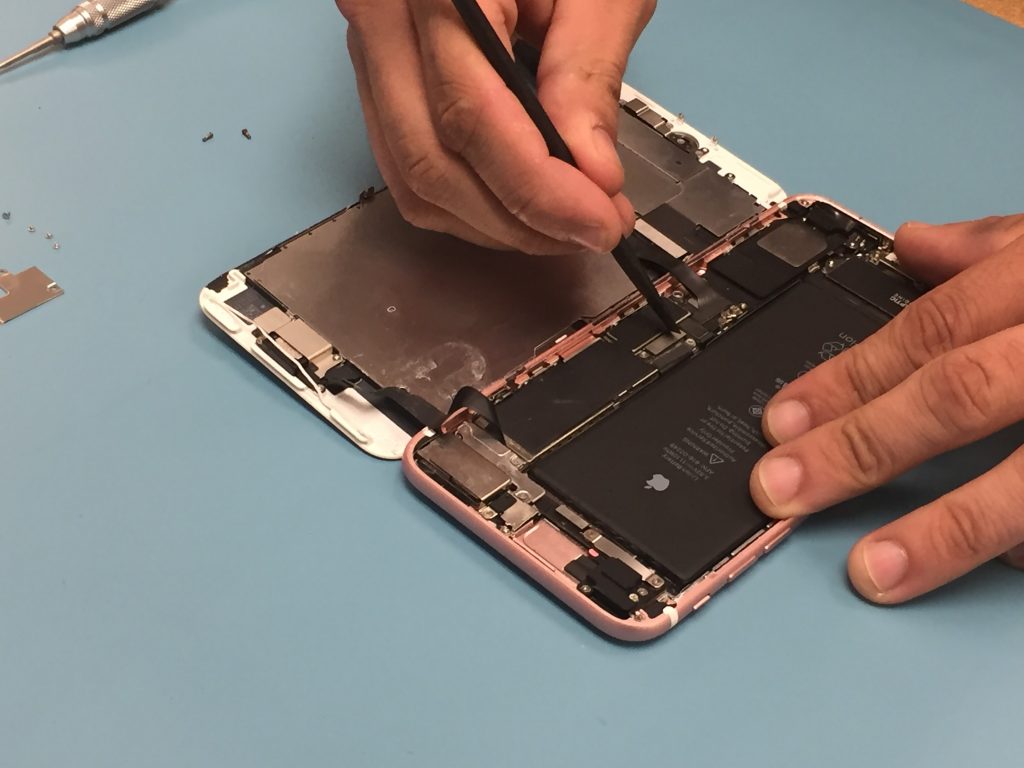
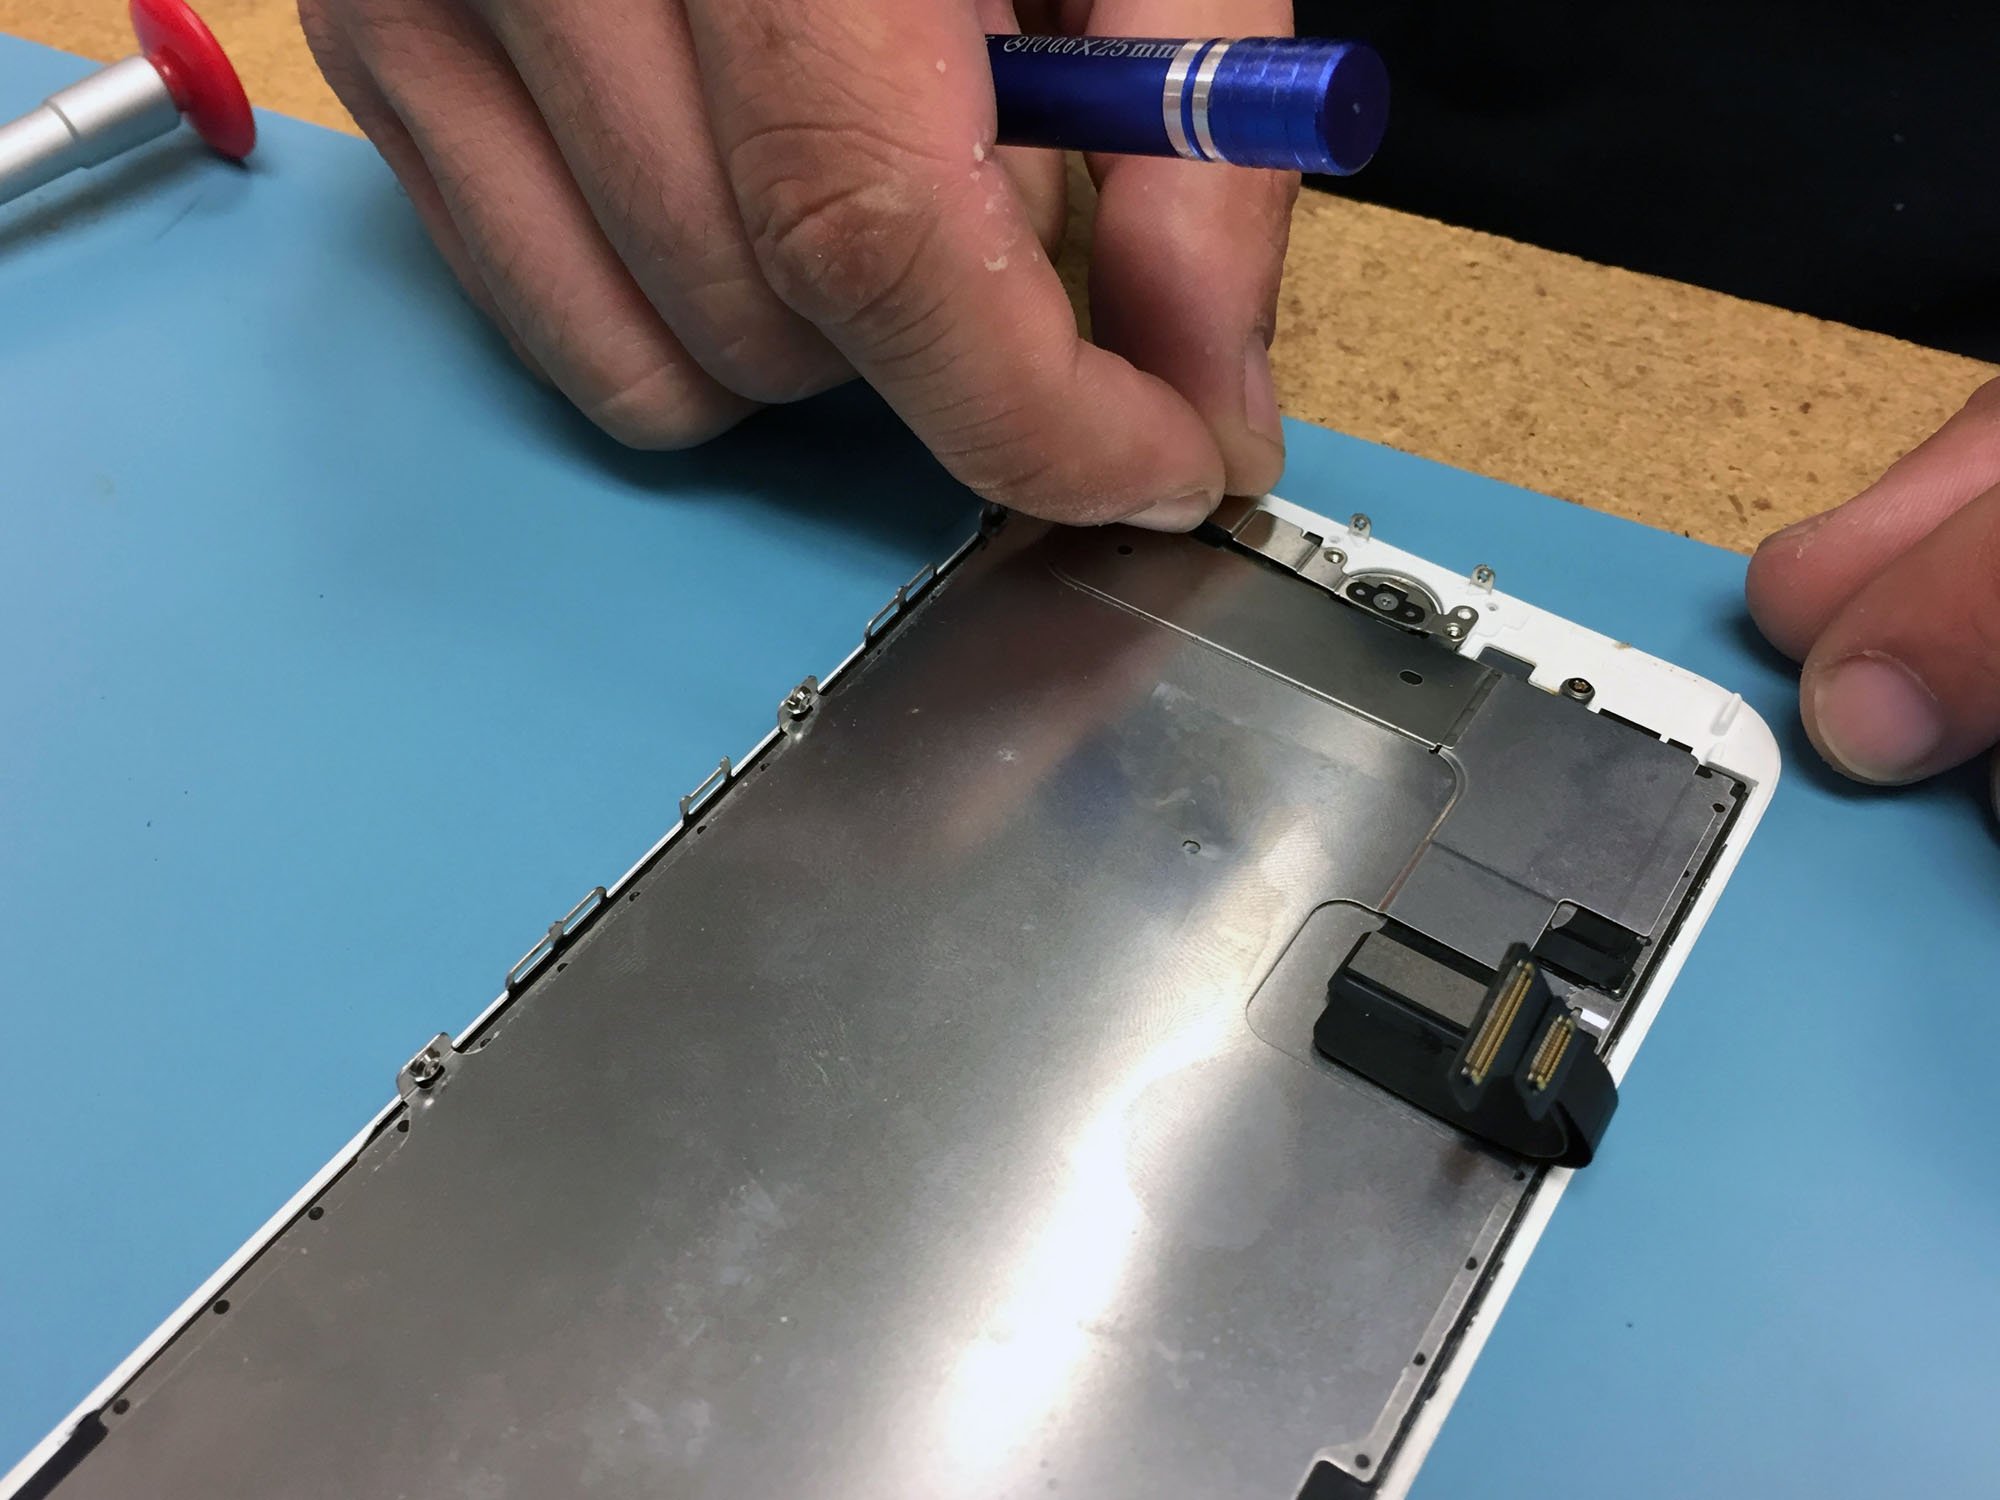
-
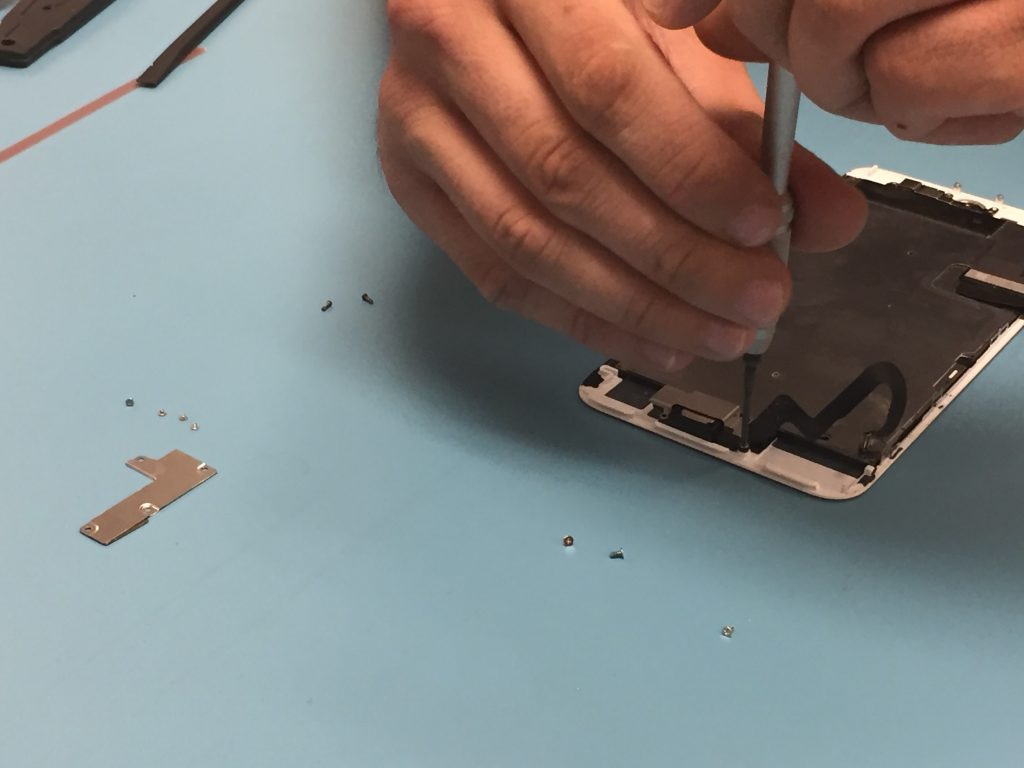
Remove the silver EMI shield on the mid-right side of the phone needs. It is secured past iv tri-betoken screws; ane of those screws is longer than the others.

-
Afterward the shield is off, employ a spudger to disconnect the battery from the logic board.
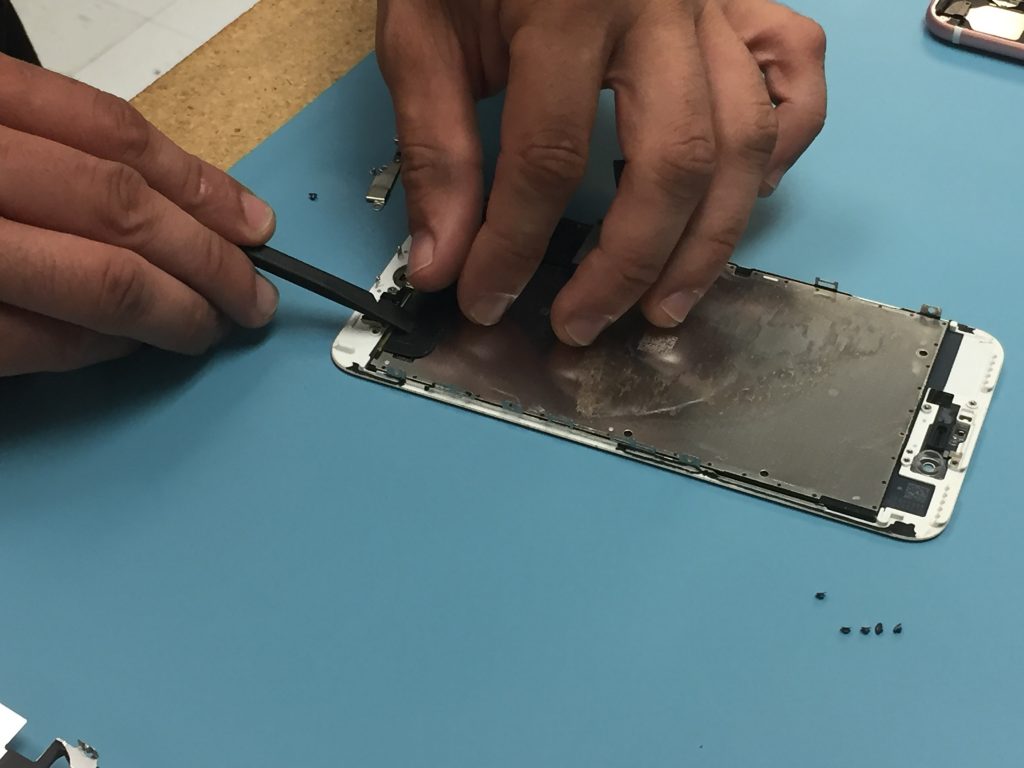
-
Disconnect the display connector flex cable using the spudger.
-
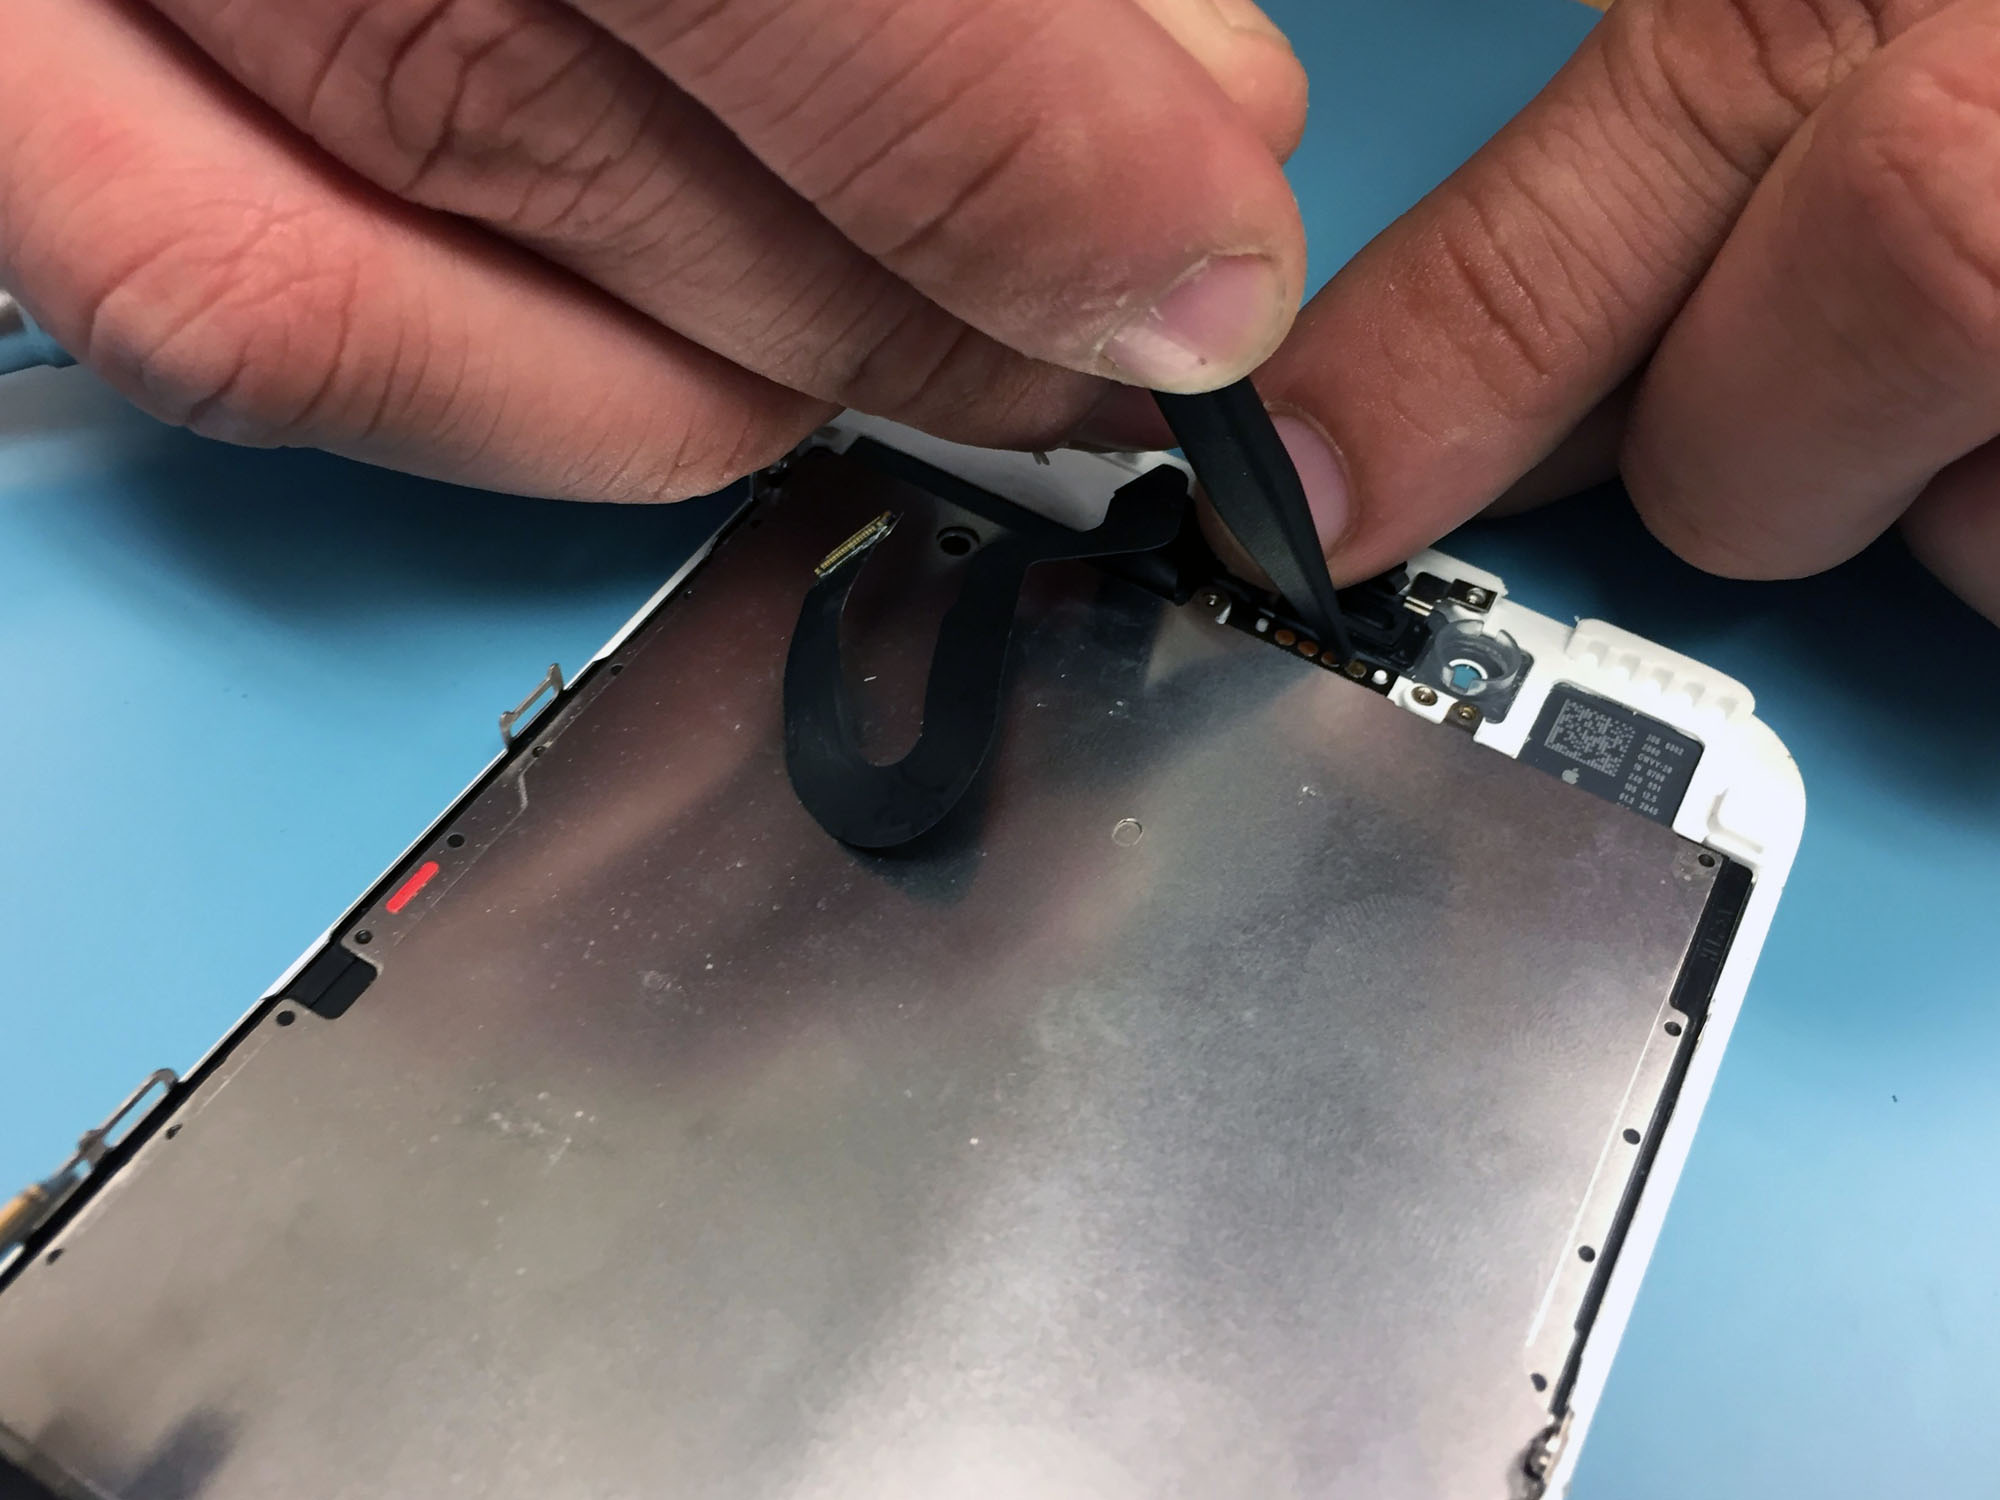
Unscrew the ii Philips head screws on the shield over the forepart console sensor associates connector; that'due south the silver shield near the top of the phone with the flex cable coming out of the bottom.
-
Disconnect the black front panel sensor associates connector cablevision from the logic lath with the spudger: It's the ane that connects the screen to the iPhone'southward body.
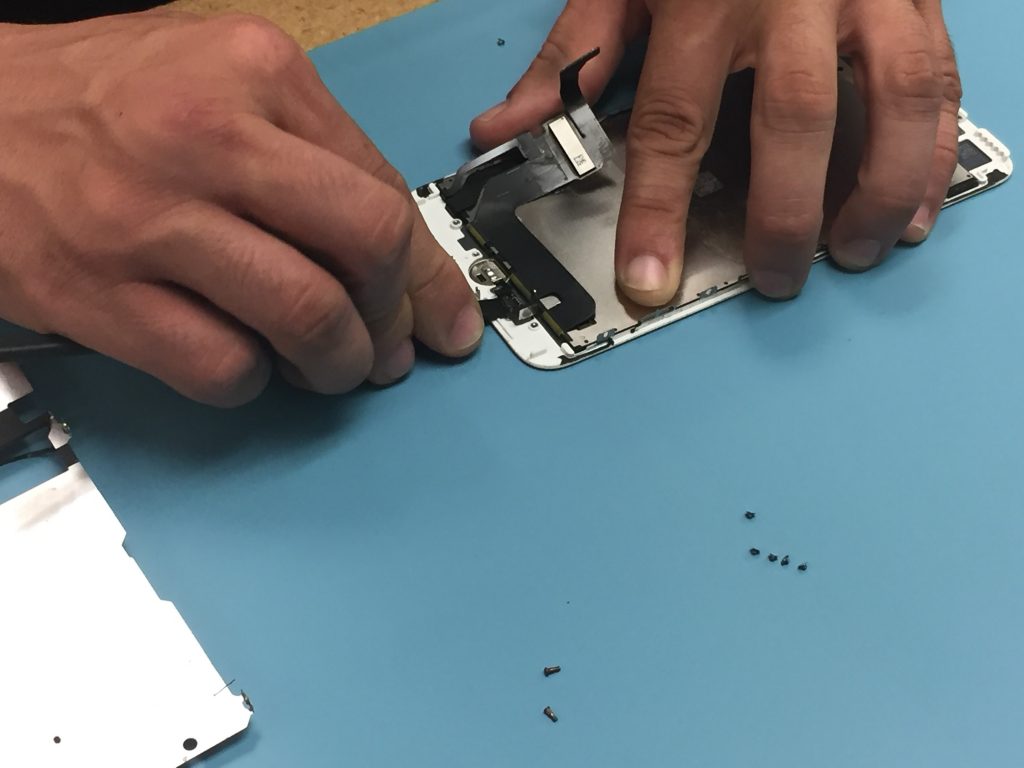
-
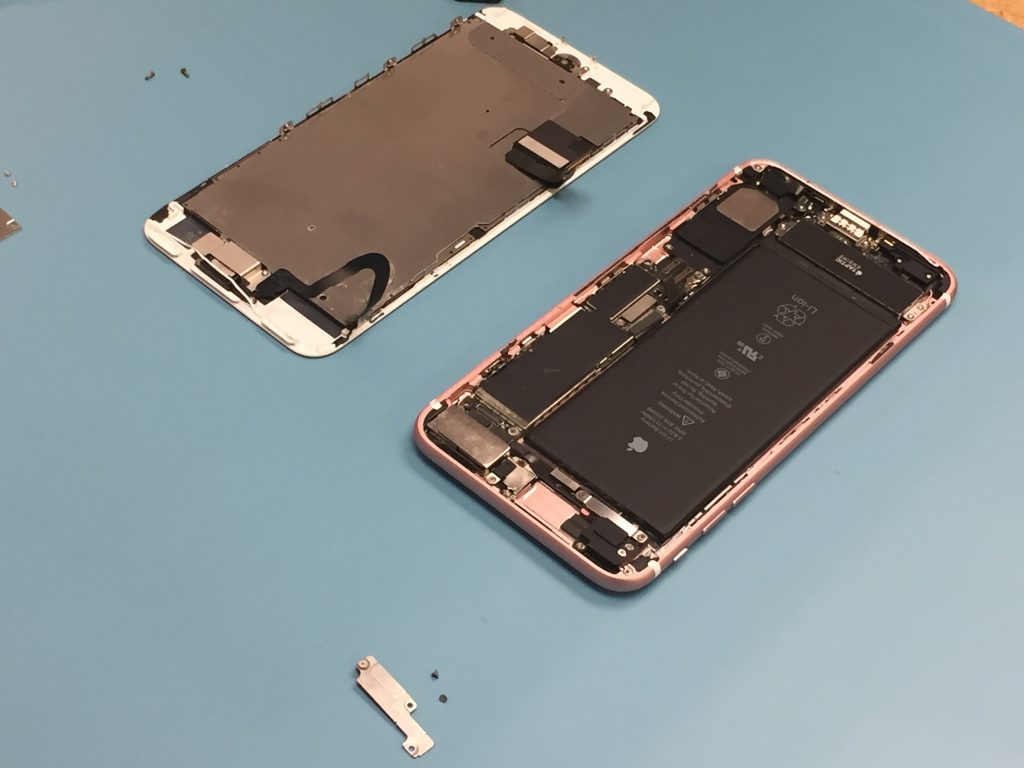
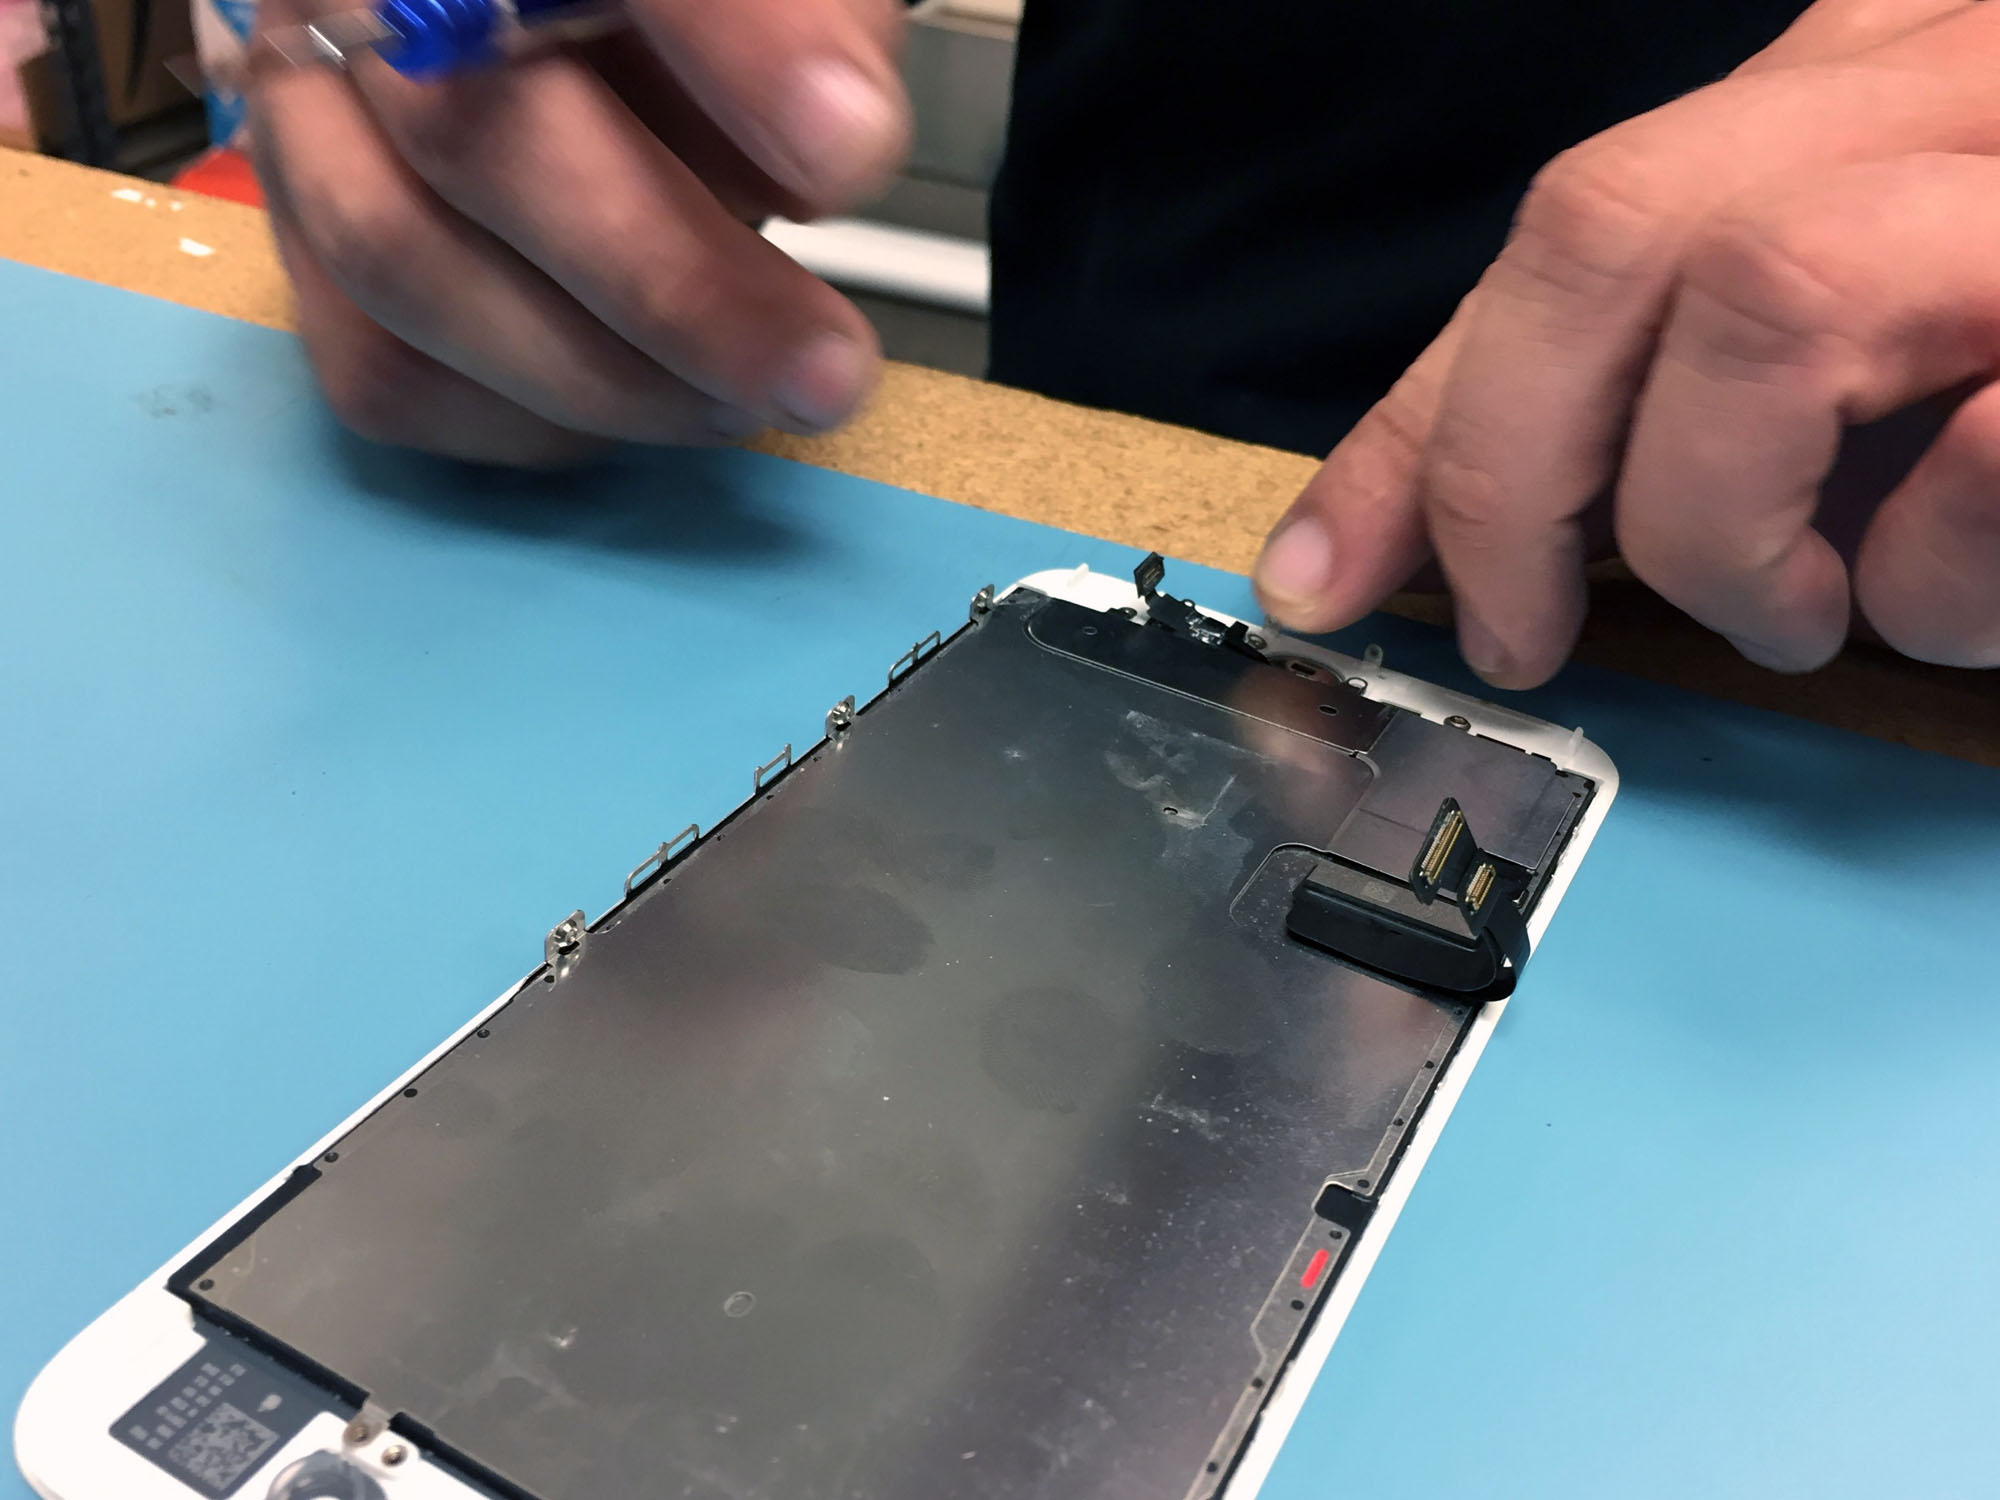
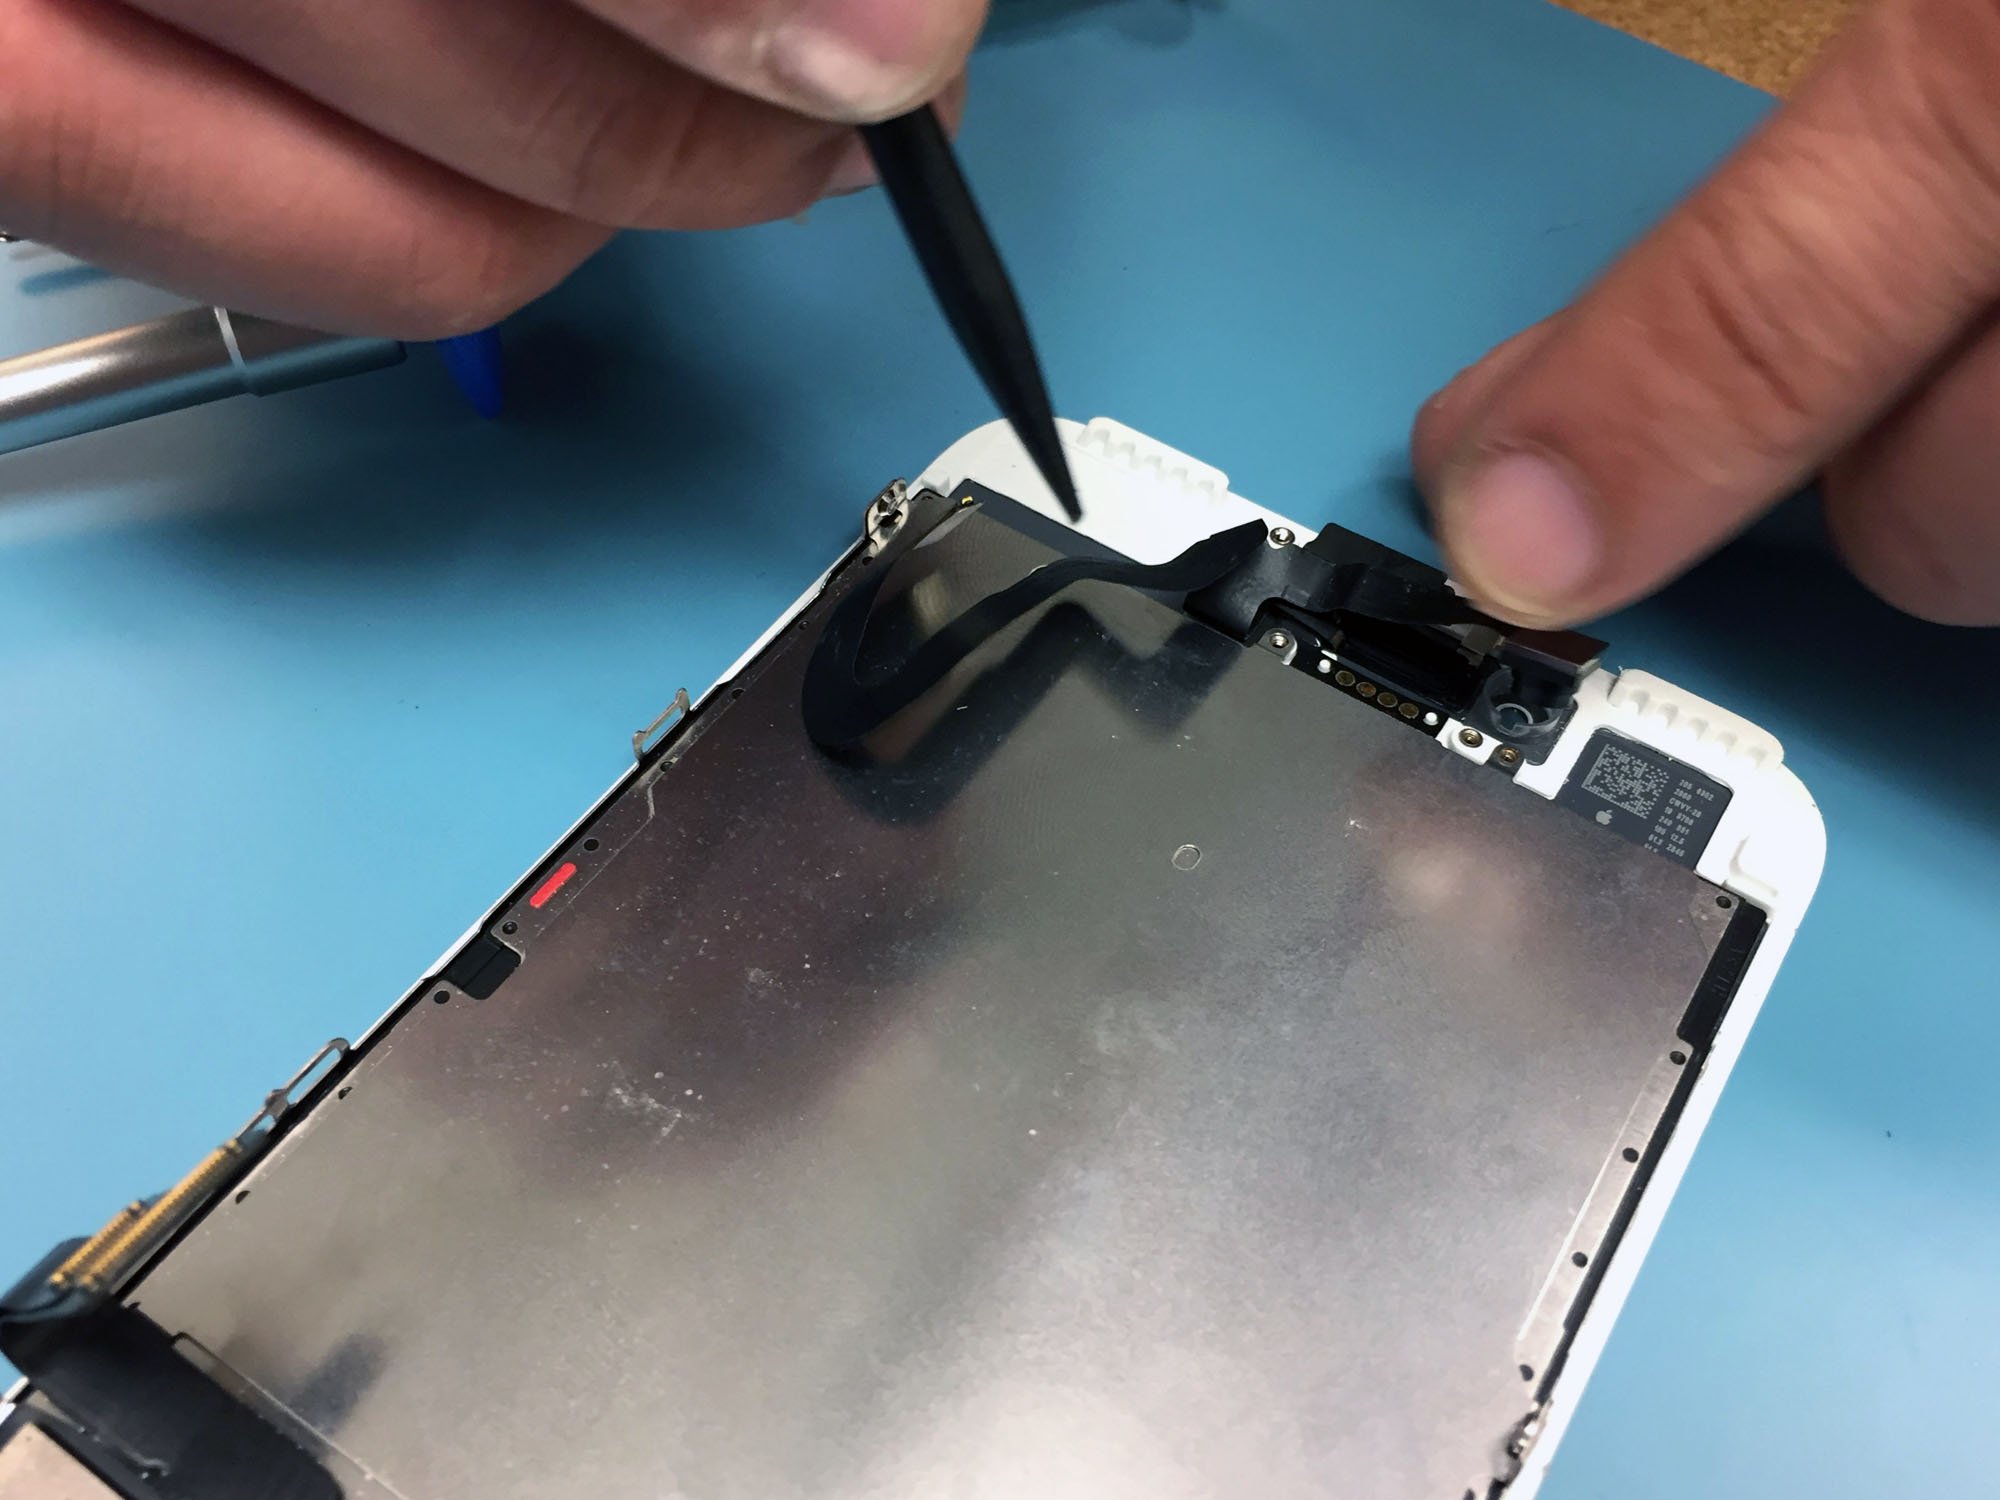
Remove the LCD assembly of the iPhone 7 Plus from the body.


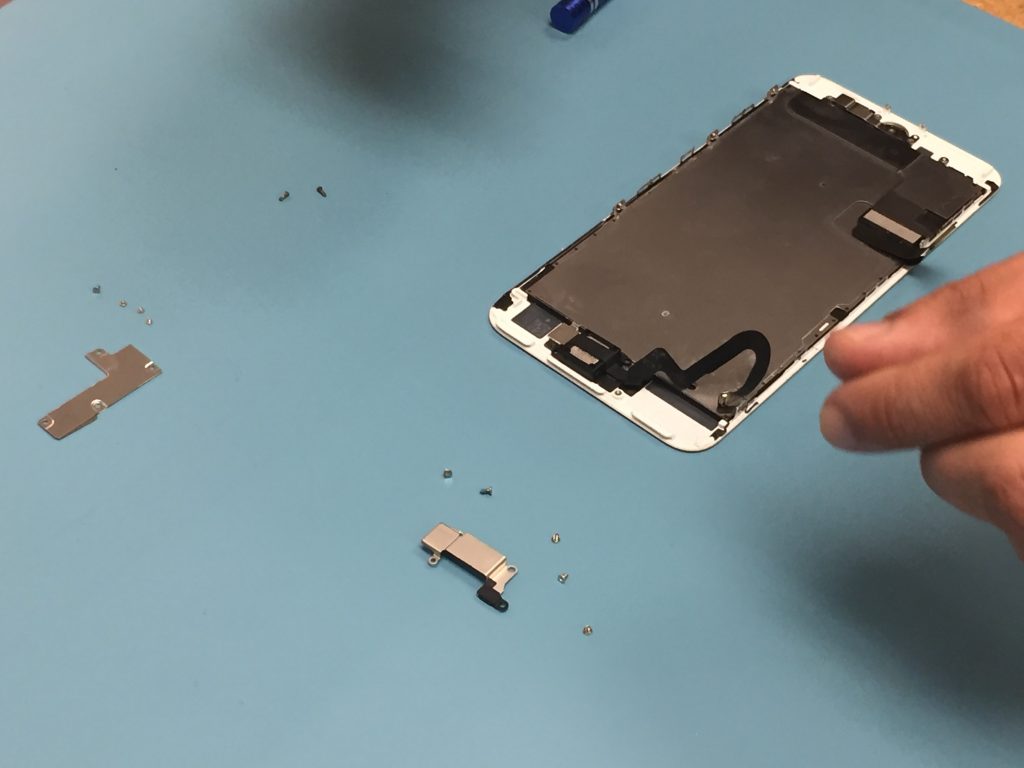
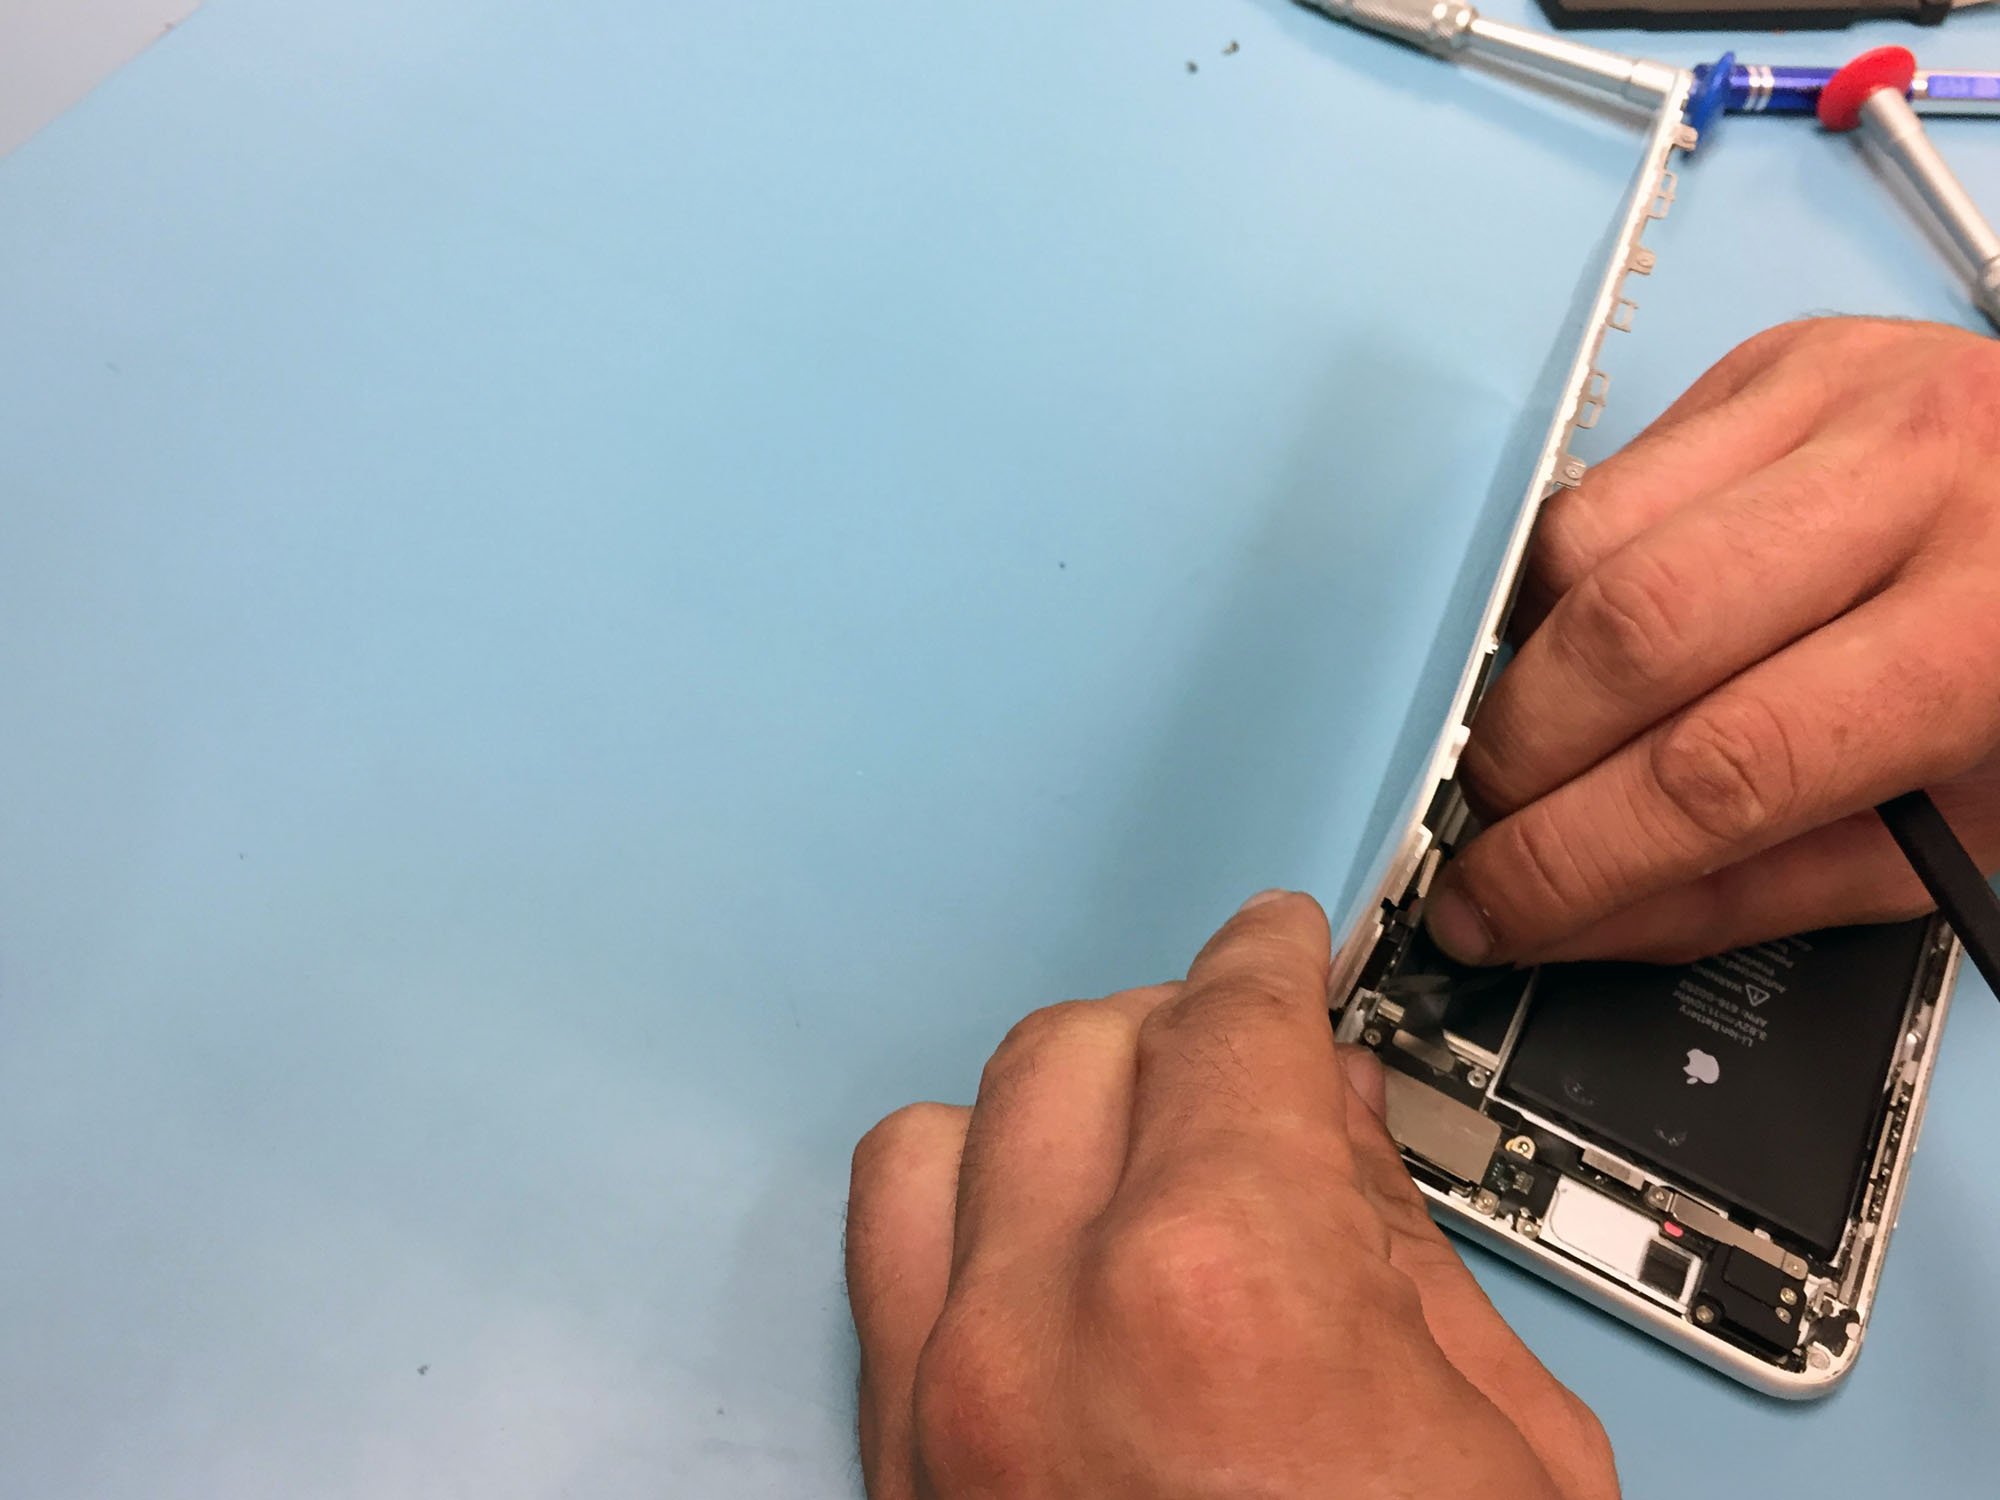
Remove the front camera and earpiece
-
Next, we will remove the five Phillips head screws that concur the silver bracket on the summit of the LCD assembly.
-
Pull the front photographic camera up and out of the way with your spudger or tweezers.
-
Yous tin now also remove the earpiece speaker.
-
Use your spudger to remove the ambient light sensor and proximity sensor. This is a thin cable that is easy to tear so use caution.


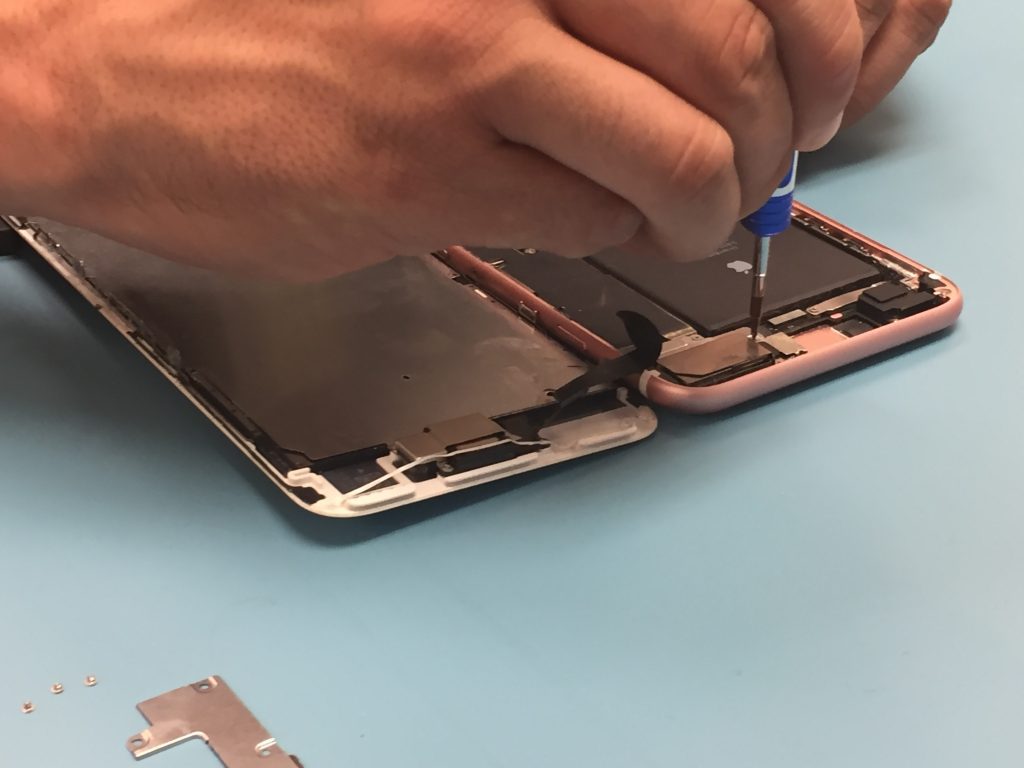
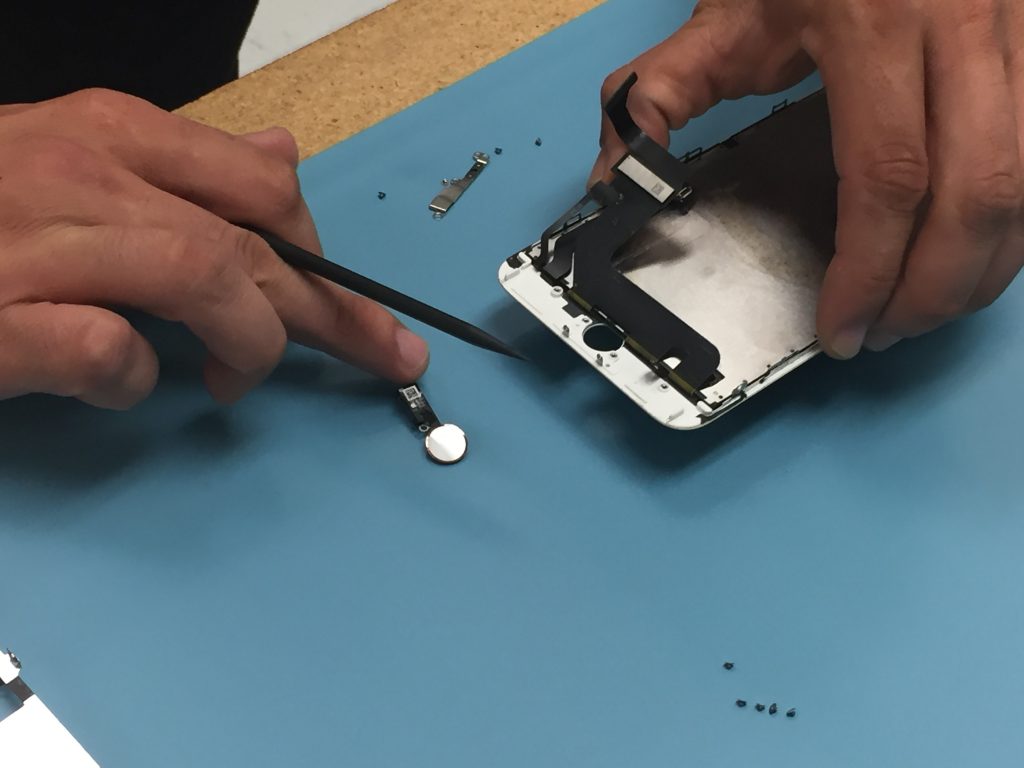
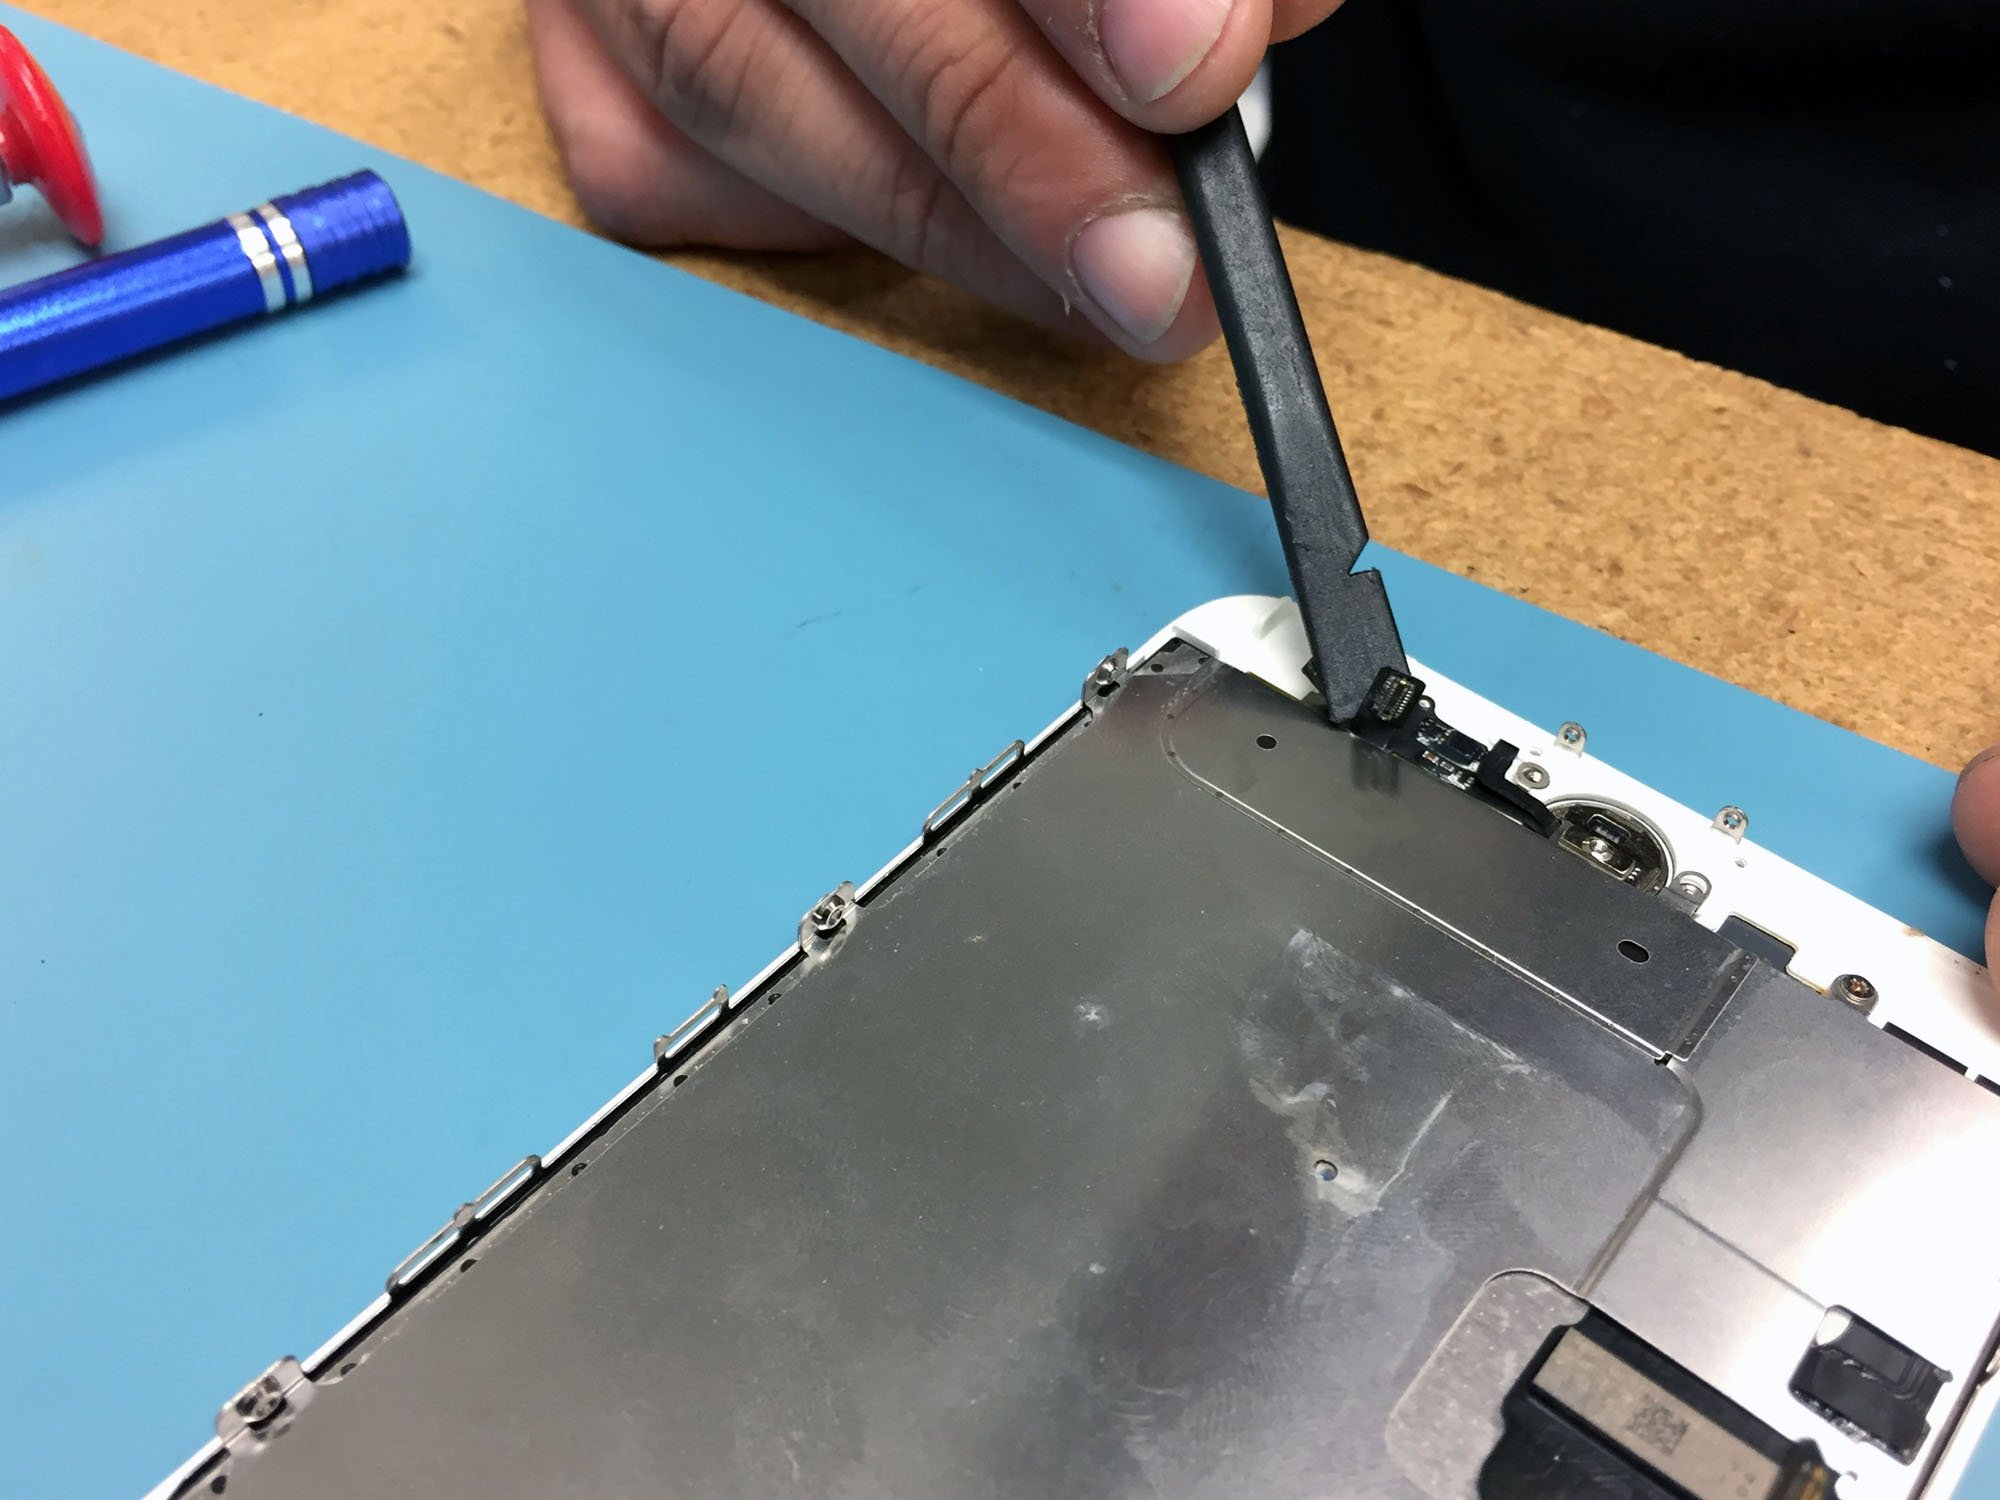
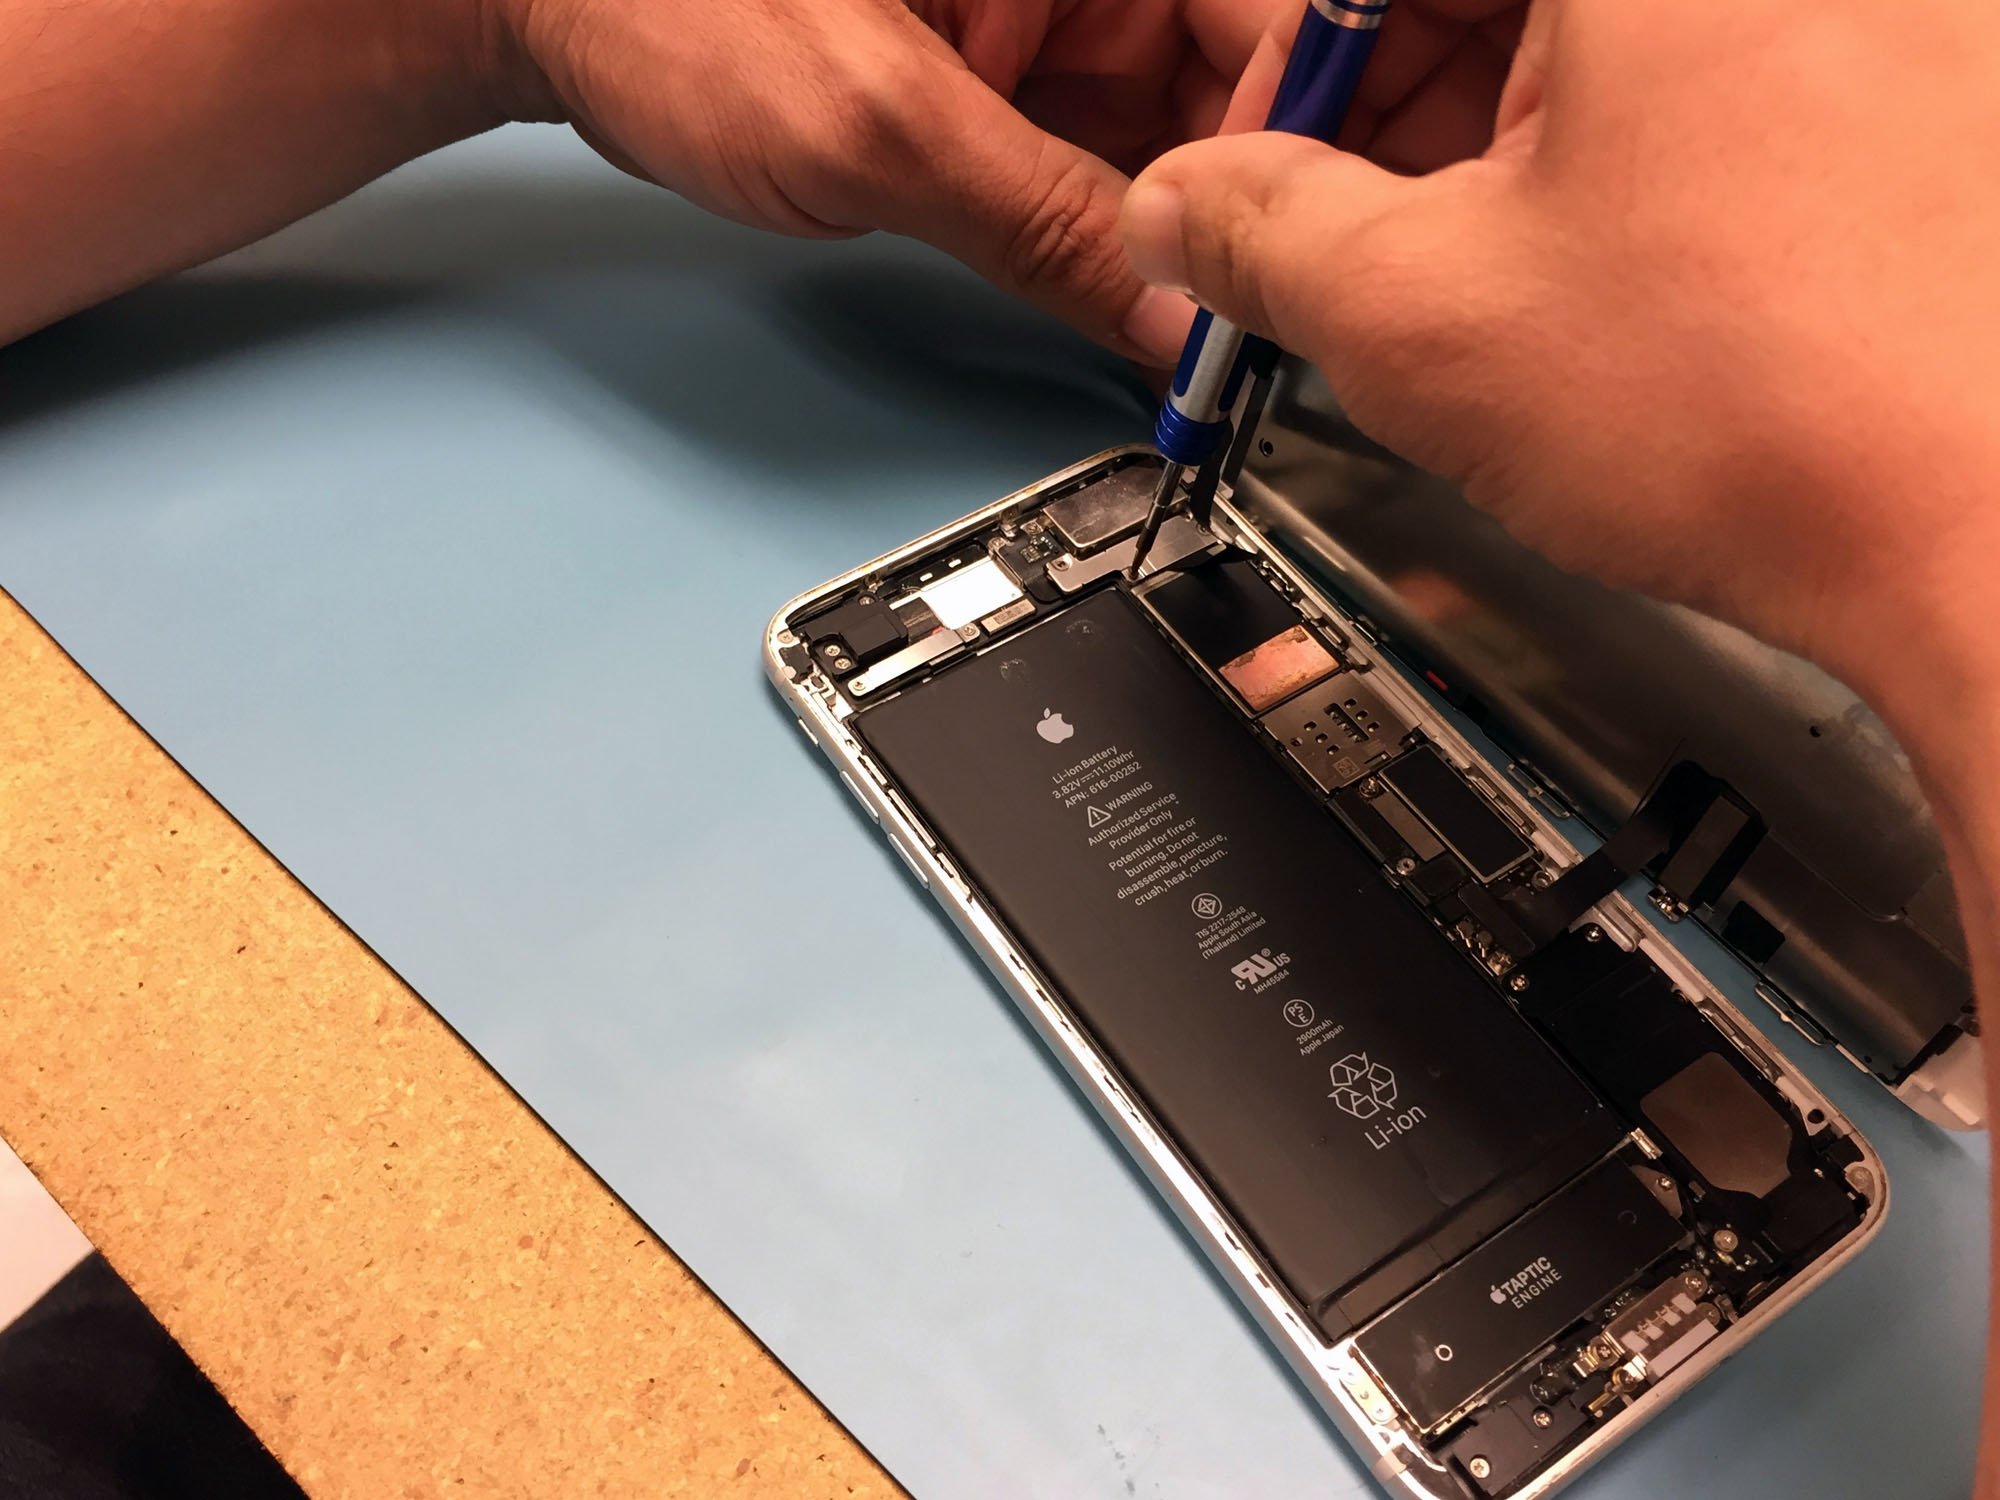
Remove the Home Push / Touch ID
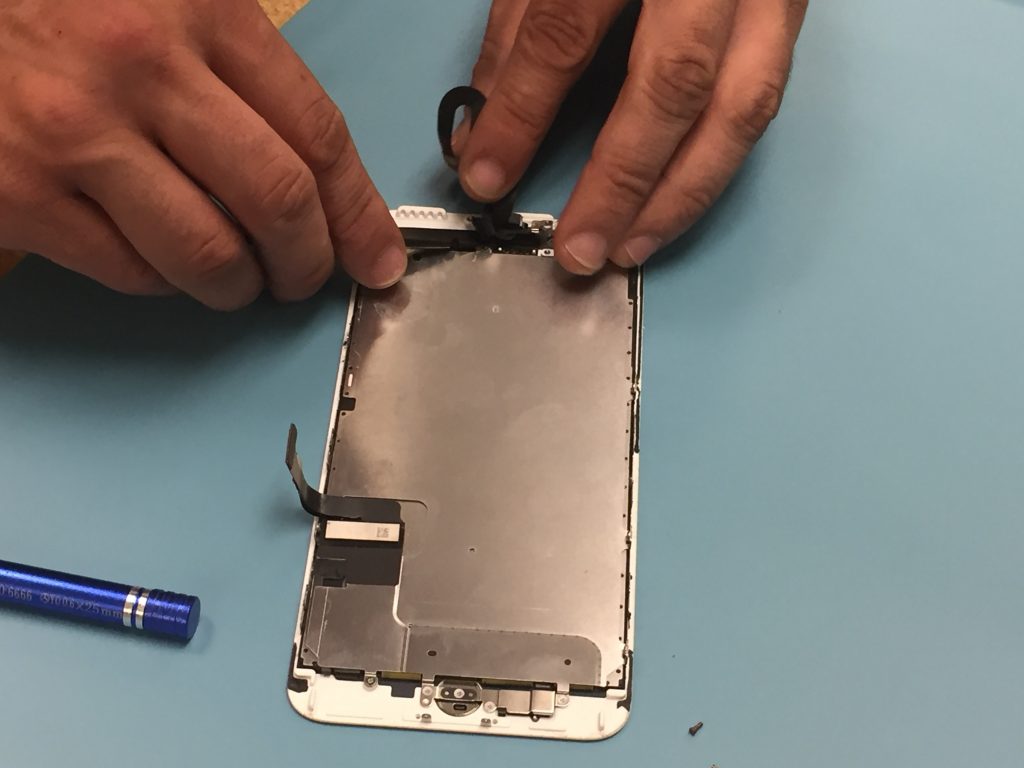
The Touch ID sensor must be removed advisedly. Failing to remove it safely or breaking any of its connectors volition require visiting an Apple Store.
-
Unscrew the pentalobe screws belongings the Touch ID and home button bracket.
-
Remove all the screws around the sides of the LCD shield. There are 5 tri-point screws and 1 Philips caput screw on the bottom edge.
-
Pull the LCD shield away from the screen. The flex cable passes through an opening on one side.
-
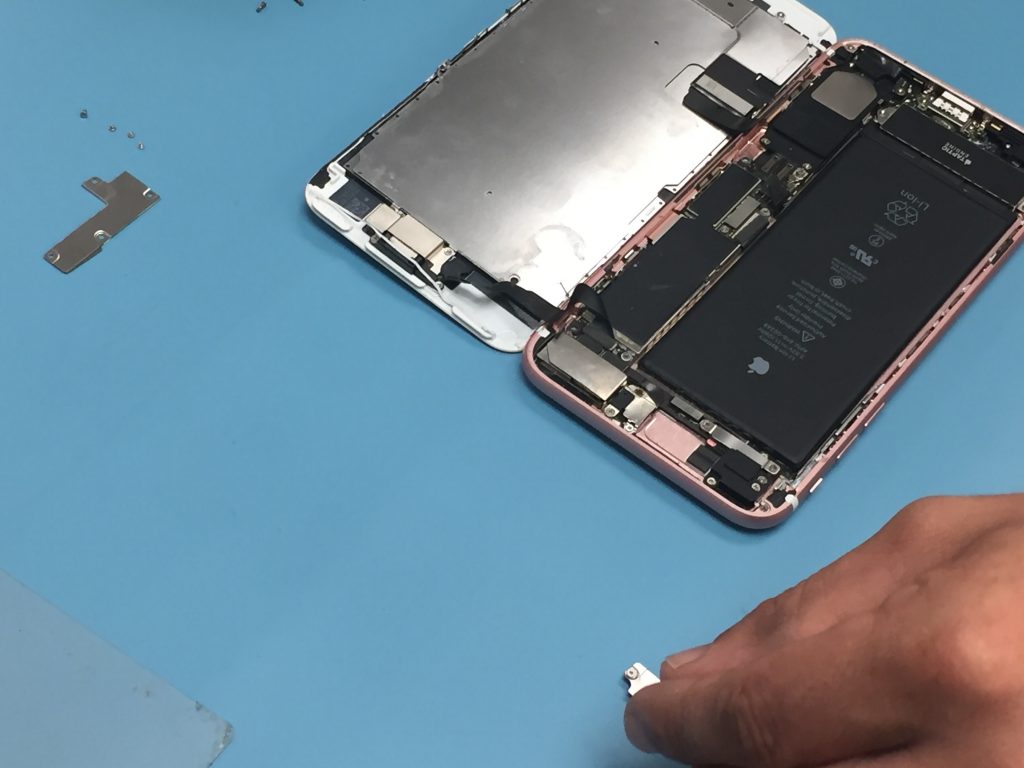
Using your spudger, disconnect the home push cablevision connector.
-
Disconnect the underlying connection carefully.
-
Pry the adhesive property the Touch ID and Home push to the back of the digitizer.
-
Push button the dwelling button forward through the front of the screen.


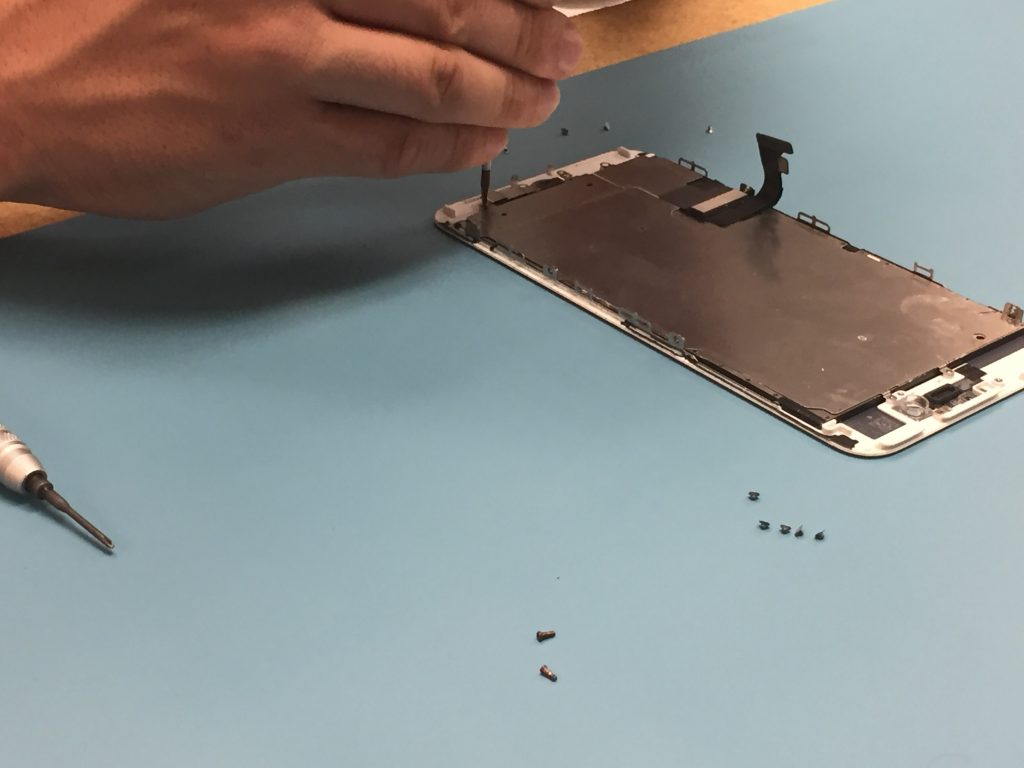
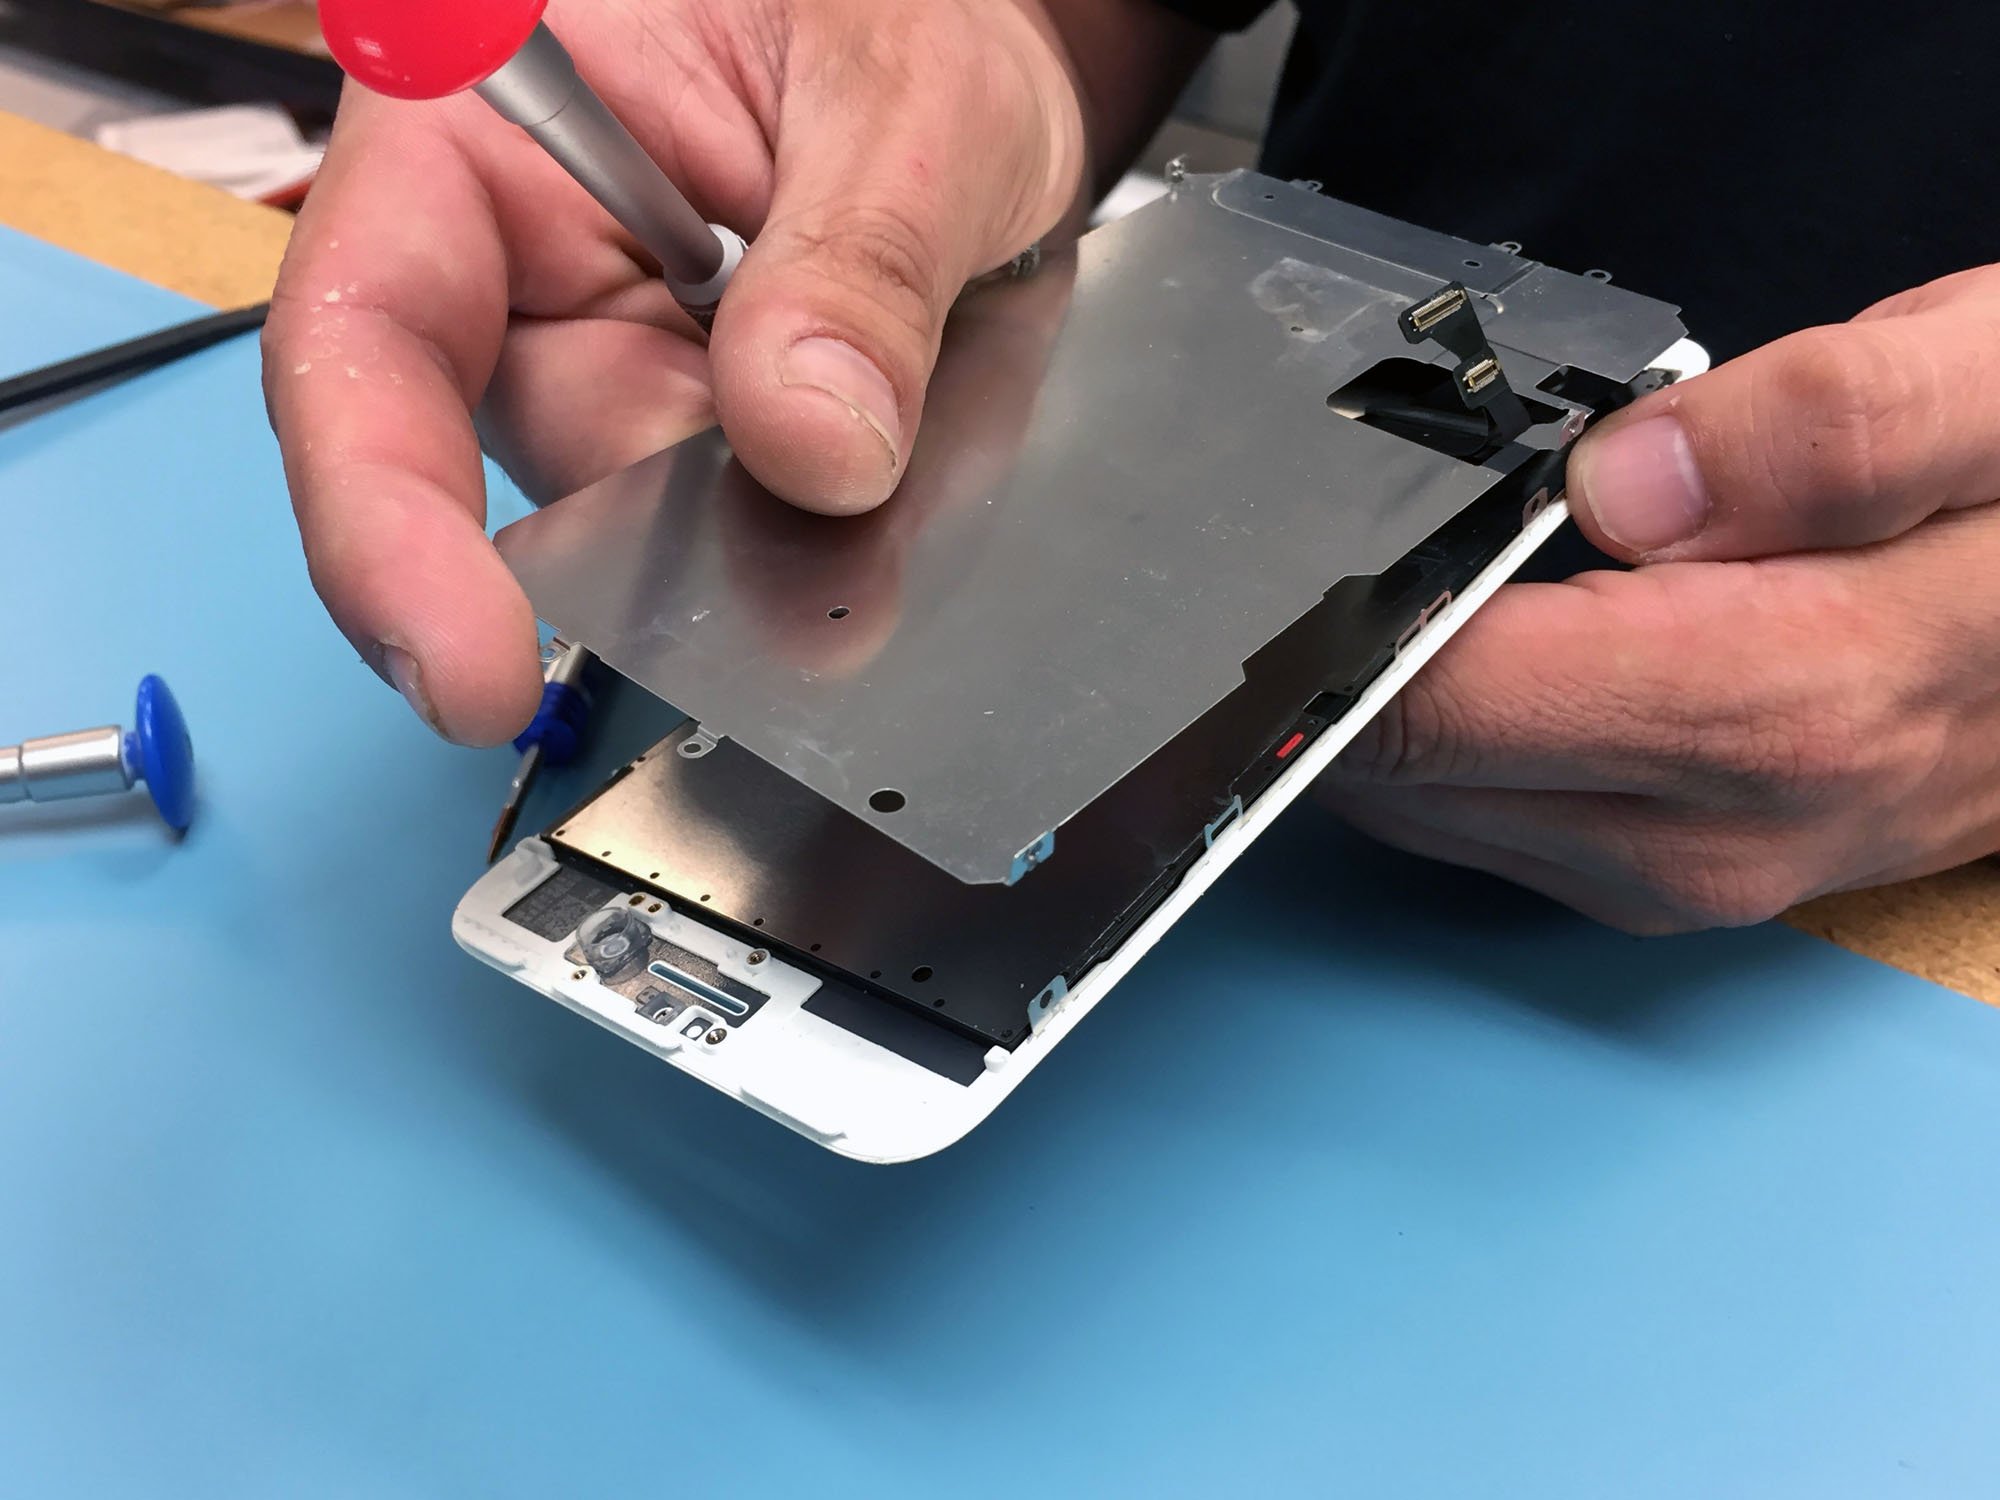
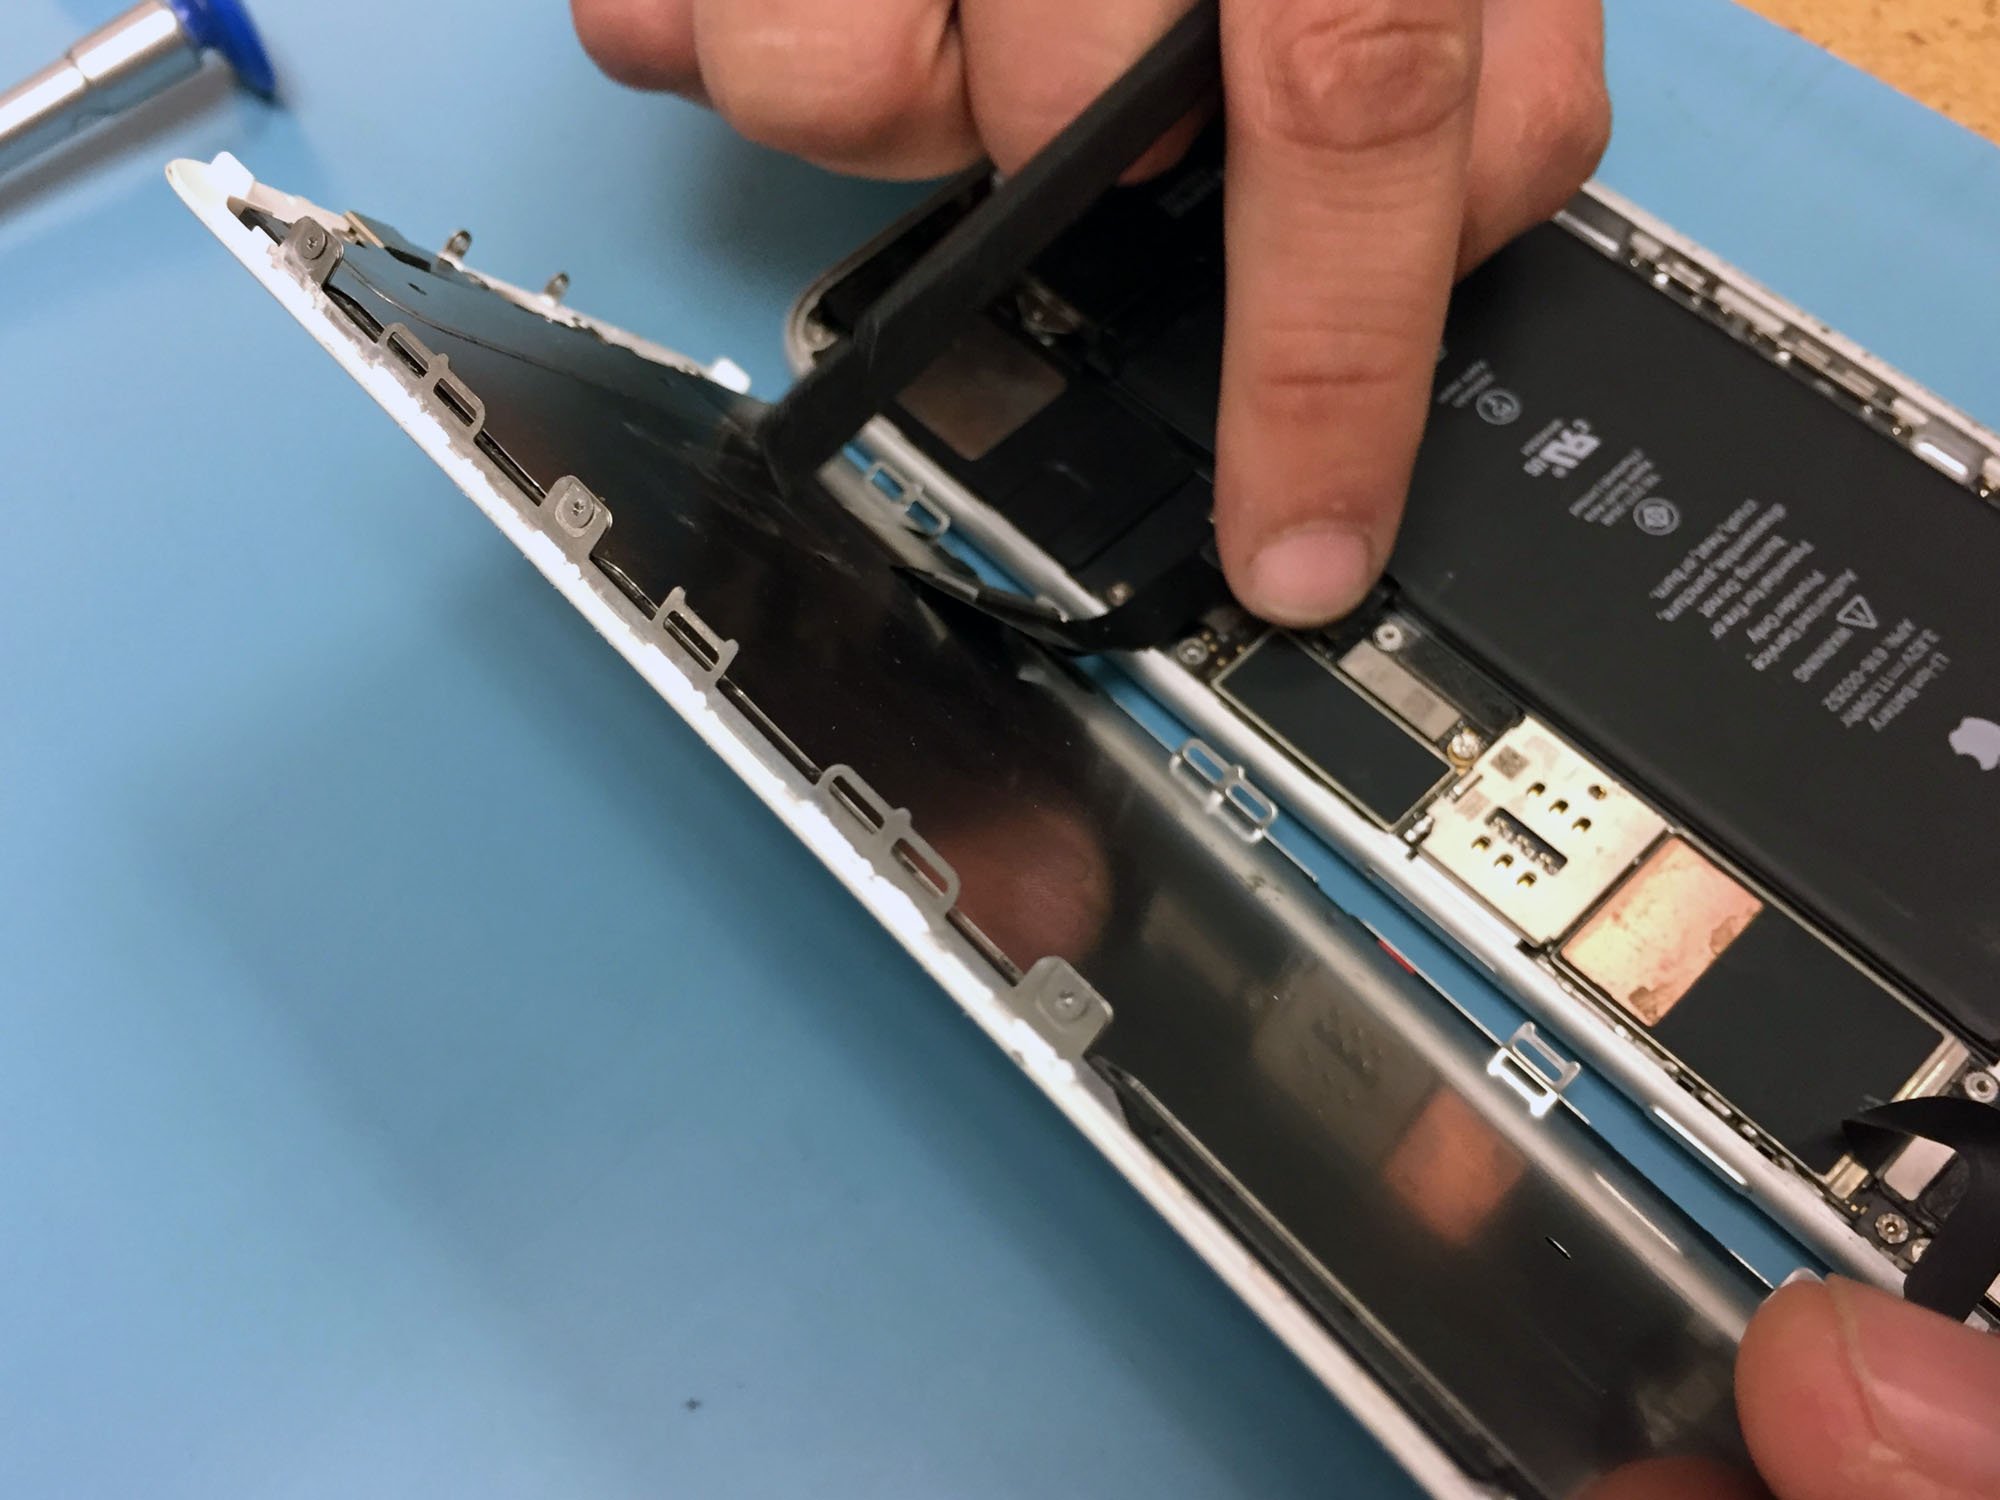
Supplant the screen
-
Insert the home button into the new screen from the forepart.
-
Reconnect the domicile push button flex cable.
-
Pass the flex cable through the LCD shield.
-
Prepare the LCD shield in place over the screen.
-
Screw the five tri-point screws and single Philips caput screw that spike the LCD shield to the screen.
-
Re-attach the home button subclass. In that location are four tri-wing screws. Do not overtighten equally this can cause home button problems. The shorter screw goes directly on the domicile push button.
-
Using your plastic spudger, gently printing the ambient calorie-free and proximity sensor back into place.
-
Re-install the front camera.
-
Re-install the earpiece speaker.

-
Adhere the bracket over the front camera. It needs five Phillips heads.


Put the components back together
-
Reconnect the front end-facing photographic camera flex to the logic board.
-
Spiral in the front end facing camera EMI shield using ii Philips head screws.
-
Reconnect the display flex cablevision.
-
Fasten the display flex EMI shield back onto the mid-correct side of the phone using its 4 tri-point screws. The longer spiral goes in the right corner.
-
Fold the screen over the torso. Insert the summit of the screen into the frame first. Proceed carefully, it volition click back into identify but don't press too hard on the drinking glass.
-
Screw in the 2 pentalobe screws that go on either side of the lightning port.


Run into problem?
If you have any other questions about this repair, or if yous observe this iPhone vii Plus repair too complicated to attempt on your ain, cheque out iMore'due south repair partner iFixYouri online at world wide web.ifixyouri.com or at 888-494-4349.
Nosotros may earn a commission for purchases using our links. Acquire more.

Source: https://www.imore.com/how-replace-your-iphone-7-plus-screen
Posted by: elamquares.blogspot.com
0 Response to "How To Install Iphone 7 Plus Screen"
Post a Comment